Compact Gaging System Allows In-Process Inspection On Small Grinding Machines
This new gaging system not only is compact enough to install on small grinding machines, but also can measure a part’s OD, ID and length to sub-micron accuracy.
Share


Product designers in a variety of industries continue to develop devices that require tiny, precisely machined components. This trend is driving machine tool manufacturers to create compact machines tailored to shape such parts. In the case of grinding machines, for example, a compact size means there is limited space for ancillary equipment such as gages for in-process inspection. Gaging systems not only allow automatic control and optimization of grinding operations, but also can greatly decrease processing time by eliminating off-line measurement of key features.
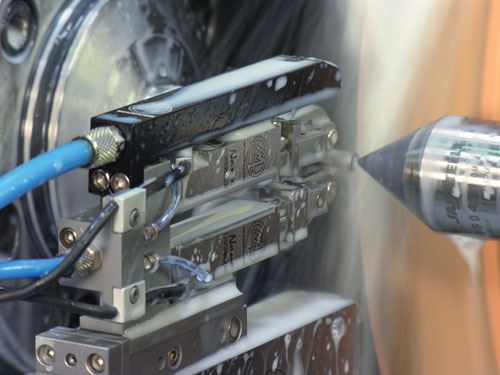
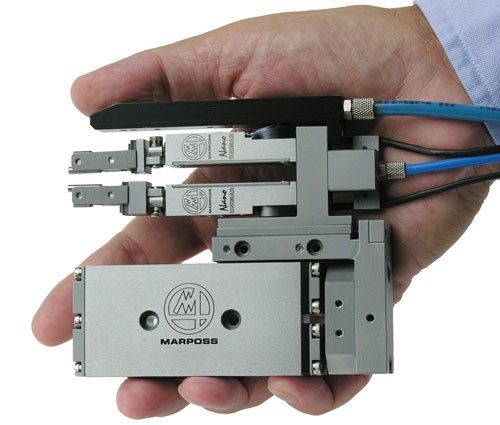
Marposs (Auburn Hills, Michigan) has designed a new gaging system that not only is compact enough to install on small grinding machines, but also can measure a part’s OD, ID and length to sub-micron accuracy. The development of the NanoUnimar gage was spurred primarily by the need for in-process measurement of ground components for medical, fuel injector, and hydraulic and pneumatic control components, the company says. These applications require the capability to precisely measure very small components at high grinding production rates.
The NanoUnimar can measure a range of ID and OD sizes after a user first manually adjust the distance between its two measuring fingers. Once the fingers are adjusted to a part’s nominal size, the device’s transducer provides 300 microns of measuring range. It can measure part IDs as small as 1 mm and part ODs that are slightly less than 1 mm. While the NanoUnimar is primarily used to measure very small components, the company says the device can be configured to measure diameters as large as 140 mm.
At 0.7 N, the NanoUnimar’s finger measuring pressure is lower than other designs, the company says. High finger pressure could adversely affect measuring results for small part features. Internal, pneumatic finger retraction eliminates the need for slides, which have the potential to introduce error during highly precise measurements. The device has an IP67 rating, which means it is resistant to splashing coolant and abrasives encountered during grinding operations.
The NanoUnimar can be used with a range of Marposs electronic units, including the P7 model, which has a cycle display and allows machine control at its screen. Alternatively, it can be directly connected to a grinding machine’s PC-based CNC using Marposs Human Interface Software (MHIS).
Related Content
-
Inside the Premium Machine Shop Making Fasteners
AMPG can’t help but take risks — its management doesn’t know how to run machines. But these risks have enabled it to become a runaway success in its market.
-
The Future of High Feed Milling in Modern Manufacturing
Achieve higher metal removal rates and enhanced predictability with ISCAR’s advanced high-feed milling tools — optimized for today’s competitive global market.
-
Ballbar Testing Benefits Low-Volume Manufacturing
Thanks to ballbar testing with a Renishaw QC20-W, the Autodesk Technology Centers now have more confidence in their machine tools.


