Automated Part Setup Maximizes Machine Utilization for Additive Manufacturing
MSP recently worked with Renishaw PLC to automate part setup and improve productivity for 3T Additive Manufacturing Ltd., helping cut part setup time from 5 hours to 10 minutes.
Share


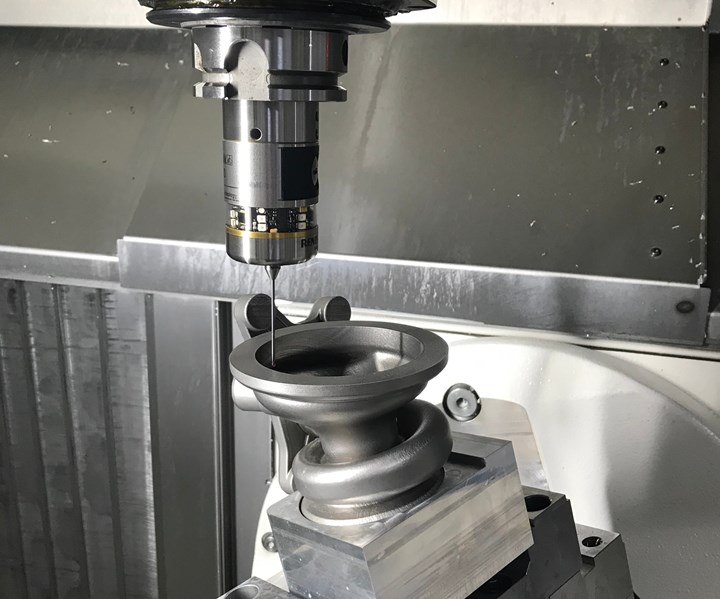
3T-am’s part setup was reduced from five hours to just 10 minutes.
U.K.-based 3T Additive Manufacturing Ltd. (3T-am) has reduced its part setup time from five hours to just 10 minutes by adopting an automated manufacturing process that includes a tool probe from Renishaw PLC and part setup software from Metrology Software Products Ltd. (MSP), a Renishaw associate company. This automated process enables 3T-am to set up and align a full batch of parts during the day and run unattended at night compared to its previous process of producing just one part per day.
While traditionally known for its prototype capabilities, 3T-am has grown to become a serial production company. To meet customer demand, the additive manufacturing (AM) firm needed to expand its capability and capacity. To do this, the company made significant investments in two five-axis mills and a coordinate measuring machine (CMM). Despite this extra capacity, each part still required manual setup. This often led operators to work unplanned overtime shifts to fulfill urgent orders and meet quick turnaround times. It became crucial for the company to address its setup processes.
Right the First Time
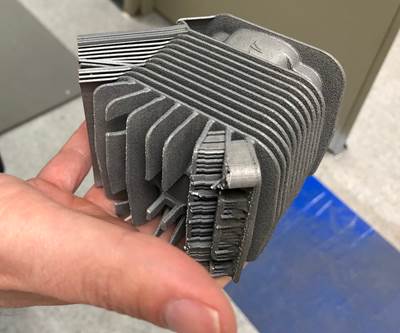
The challenge with producing AM parts correctly the first time is that their near-net shape leaves little material to work with, reducing the margin for error. These often complex shapes have no orthogonal surfaces on which to locate, making it difficult to achieve accurate alignments. Furthermore, the AM build process can cause parts to distort, meaning their final shape is often marginally different to the original CAD model.
In the past, 3T-am would manually locate the part in the fixture to ensure correct alignment. Test-spotting cuts were made to visually identify positional error. Then, either the part was manually adjusted again or updates to the machining program were made. This manual setup process took roughly five hours per part, but more complex parts could take a day.
Once the initial part was machined, a first-article inspection was performed on the CMM before the rest of the batch could be manufactured. For a complex part, 67 (or more) features could be inspected. Only at this stage would errors be picked up, resulting in a necessary adjustment to the setup process and a delay in the manufacture of the other parts. Even if the inspection process passed, the machine tool would sit unused waiting for the inspection results.
Another problem with the lengthy setup process was that jobs were passed between operators and engineers changing shifts, which resulted in extensive and technical handovers to safeguard the alignments. For more complex parts, a “one job, one person” method was used to avoid key information being missed, which led to dependency on a single person and their shift availability for the part’s manufacture. This sometimes resulted in excessive overtime for and pressure on the engineer.
Martin Jarvis, production engineer at 3T-am, says that the company’s manual setup was high-risk and the workers had low confidence. “We would be nervous when the finished part was taken to inspection, as our day’s work could be written off and we would need to do an expensive single-part rebuild and fast-track it through production to ensure it was delivered on time. That was a problem.”
Automating Setup
3T-am turned to Renishaw and MSP to help reduce setup times, improve quality and automate its processes in order to make full use of its pallet changing system for lights-out production and to maximize machining capacity.
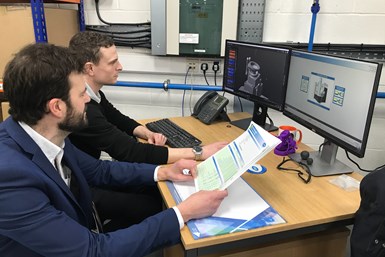
3T-am invested in NC-Inspect Modus (left screen) and NC-PerfectPart (right screen).
Renishaw’s OMP600 high-accuracy machine tool probe and MSP’s NC-PerfectPart software enables 3T-am to identify and correct errors in part positioning and machine performance prior to machining. Along with the benefit of automated job setup, the OMP600 offers the ability to measure complex 3D part geometries and, in combination with MSP’s software, automates machining processes and virtually eliminates the potential for human error.
NC-PerfectPart assesses the machine tool’s geometric performance to ensure it is calibrated and correct in five-axis movement. This confirms that every aspect of the probe and machine performance is within set tolerances prior to part setup and machining to ensure the parts can be finished accurately.
The part is securely loaded into the machine, and the software then measures the part to calculate an accurate best-fit alignment in six degrees of freedom. The controller is automatically updated to compensate for the discrepancy between the physical part location and the nominal machining program to ensure the machining path takes place where the real part is. This eliminates the need to manually fixture and adjust the part. Any misalignment errors are automatically removed, and the time taken to align or locate the part is significantly reduced.
The same measurements are then used by the software to check the part’s condition of supply. It produces a pre-machining inspection report, which shows if there is too much distortion or not enough material to create a good part or cleanup in the areas that are to be machined. This is generated before any machining begins so that the part process can be stopped from the outset if any condition of supply errors are present.
NC-PerfectPart’s ability to automate part alignment and take measurements at any tool orientation, in any direction, also enables the shop to use generic workholding. This removes the need for expensive location fixtures and allows the same fixture to be used for multiple parts where applicable.
At the end of the process, the part can be inspected on the machine using NC-PerfectPart before it is removed from the fixture, and a post-machining verification report verifies the part has been machined within tolerance. This reduces reliance on the CMM and automates the inspection process.
3T-am also invested in MSP’s NC-Inspect Modus to generate the alignment and inspection probing programs for NC-PerfectPart to run. This product was specifically designed to be compatible with NC-PerfectPart, making it quicker and easier to create the probing programs. They can be generated offline to limit the amount of machine downtime.
The Confidence for Complex
The savings 3T-am has experienced by switching from a manual part alignment process to an automated one has given the company the confidence to complete the setup and alignment for a full batch in the machine during the day and leave the machine to run overnight for full 24/7 lights-out automation.
“We now have the potential to use our machines at full capacity,” Mr. Jarvis says. “This is an increase of 157% compared to our average weekly usage before.”
One shift now can be used to set up the parts. As the software confirms all alignments are correct, the operator can transfer to the person taking over with confidence that the parts will be machined within tolerance.
According to Mr. Jarvis, “Automation has been very important for us. We work within a very fast-moving industry and one where we are always learning. We constantly try and push ourselves. We can now finish parts that are at high risk of distortion and achieve all of the complex alignments or complicated part designs that were so challenging with manual setup. It has given us the ability and confidence to take on more complex work and expand our capability.”
Related Content
Same Headcount, Double the Sales: Successful Job Shop Automation
Doubling sales requires more than just robots. Pro Products’ staff works in tandem with robots, performing inspection and other value-added activities.
Read MoreIncreasing Productivity with Digitalization and AI
Job shops are implementing automation and digitalization into workflows to eliminate set up time and increase repeatability in production.
Read MoreInvesting in Automation, Five-Axis to Increase Production Capacity
To meet an increase in demand, this shop invested heavily in automation solutions and five-axis machines to ramp up its production capabilities.
Read MoreCNC Machine Shop Honored for Automation, Machine Monitoring
From cobots to machine monitoring, this Top Shop honoree shows that machining technology is about more than the machine tool.
Read MoreRead Next
OEMs and Job Shops See Metal Additive Manufacturing Differently
When should a machine shop consider production metal 3D printing? Part of the answer might be when that machine shop also does design. Cobra Aero is a small shop thriving with AM, because it’s also an OEM.
Read More3D Printing the "Impossible" Metal Part
Velo3D’s SupportFree additive manufacturing process helps KW Micro Power turn a geometrically complex design concept into reality.
Read MoreSetting Up the Building Blocks for a Digital Factory
Woodward Inc. spent over a year developing an API to connect machines to its digital factory. Caron Engineering’s MiConnect has cut most of this process while also granting the shop greater access to machine information.
Read More


.jpg;maxWidth=300;quality=90)


