Automated Honing Creates Consistent Parts
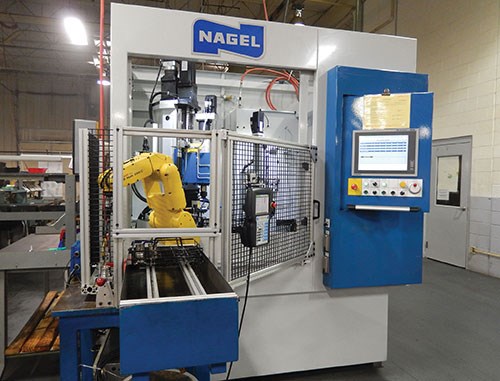
Micron Manufacturing’s fully automated, one-spindle Nagel Eco 40 hone with post process gaging and automatic wear compensation improved bore quality on a fuel injector and also provided consistent uptime.
Share


.png;maxWidth=45)
DMG MORI - Cincinnati
Featured Content
View More
Autodesk, Inc.
Featured Content
View More


To meet demanding size and surface finish requirements for complex parts, Micron Manufacturing of Lagrange, Ohio, used a single-pass honing/diamond sizing system. However, the company realized that this process was creating inconsistent parts as well as increasing downtime and inspection costs. By adding a fully automated Nagel Eco 40 honing machine from Nagel Precision (Ann Arbor, Michigan), the company eliminated its quality issues and achieved consistent uptime.
For more than 20 years, Micron Manufacturing has manufactured high-precision, intricate components and subassemblies for vehicle systems manufacturers. Production volumes range from 200,000 to 4,000,000 parts per year, and sizes range from 3 to 125 mm. The company processes raw materials including barstock, cold-headed blanks and forgings made from carbon and stainless steels.
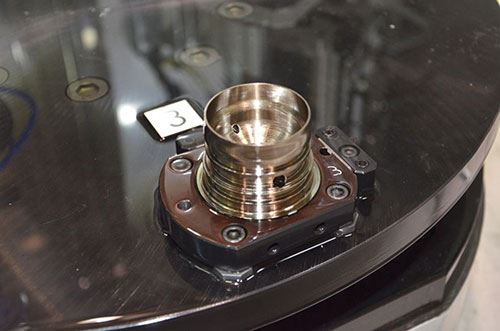
In a recent nickel-plated fuel injector housing application, one of the bores required a size tolerance of ±3 microns and surface finish with a maximum Ra of 0.2 micron, a maximum Rpk of 0.2 micron and a minimum Rvk of 0.1 micron.
Micron was initially using a single-pass honing/diamond sizing system to achieve these specifications, but some of the machine’s characteristics made this difficult. The system’s typical plated-mandrel type tools required manual wear compensation achieved by plastic deformation. All the honing spindles in the diamond sizing machine were driven by a single motor and mounted on a slide. The rotary index table moved the part from station to station, and the part was inspected manually at the end of the cycle. These factors caused Micron to experience numerous problems while producing the fuel injector housing with this process.
For instance, the way that the system’s tools compensated for wear made them very inconsistent. Given that the plated tools have just one layer of cutting tool, they do not permit dressing after plating to guarantee that the first part is good all the time. As a result, Micron says that tool change was a nightmare. According to the company, sometimes it took weeks of trial and process adjustment to find a tool that could hold the size and surface finish specifications. This caused severe, frequent disruptions in the production process and necessitated a bank of parts to cover the customer pull during nonproductive phases. Approximately 25 percent of the tools could never meet the finish requirements and had to be scrapped. As a result, a large tool inventory was maintained all the time.
Another problem with the diamond sizing process was that it was consuming most of the allowable print tolerance, which significantly increased the final inspection costs.
Also, the final inspection process could not identify which tools in the various stations were worn. The operator had to measure the bore size in every station individually, and then replace the worn tool. These frequent stoppages, in addition to causing downtime, also had a detrimental effect on tool life. For example, if the tool in the roughing station (the first station) were to wear at a faster rate, the resultant bore would be smaller and other tools downstream had to compensate by trying to take more stock. This caused tools in subsequent stations to wear prematurely.
These problems led Mark Zupan, president of Micron Manufacturing, to replace the multi-spindle manual diamond sizing machine with a fully automated one-spindle Nagel Eco 40 honing machine with post process gaging and automatic wear compensation.
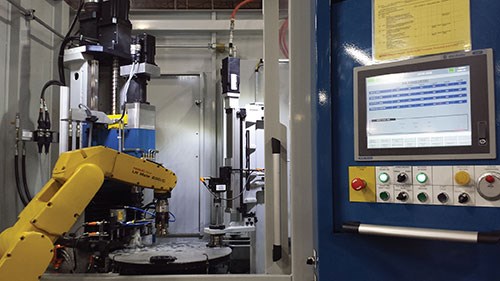
The one-spindle Eco 40 stroke honing machine consists of a servo with four axes—one each for spindle rotation, stroking, tool expansion and rotary-table actuation. It is controlled by an AB ControlLogix PLC.
The post process/final gaging system provides feedback to the automatic wear compensation system within the honing spindle. By gaging every part, bore size can now be monitored on 100 percent of parts and submicron adjustments can be made to compensate for tool wear.
The honing tool is dressed on the tool body using a precision grinder at Nagel to ensure that the first part is good to speed tool change.
The servo-controlled tool-wear compensation system is designed to further reduce non-cutting time while improving bore quality for the injector housing. Once inserted in the bore, the tool expands at a rapid feed rate of 220 microns per second at 45 percent of available torque until it reaches a pre-determined bore size close to the desired limit. It then switches to an expansion rate of 200 microns per second at 15 percent of available torque to avoid tool damage. Toward the end of the program cycle, the tool expands at 2 microns per second at about 10 percent of available torque. The system constantly monitors both tool expansion rate and percentage of available torque. The operator can reduce the tool expansion rate for tighter tolerances or increase the torque for faster cycle times. This approach yields high-quality bores in terms of finish, size and cylindricity, the company says. Parts honed in the Eco 40 consume just 50 percent of the allowable tolerance for size and finish, yielding high Cpk as well as bore roundness and straightness under 0.0005 mm.
Mr. Zupan says the Nagel Eco 40 resolved all of the problems associated with the single-pass honing/diamond sizing system and has allowed for smaller tool inventories. The payback for Micron came immediately from quick and reliable tool changes, improved bore quality and consistent uptime, he says. The post process gaging and automatic size compensation feature on the Eco 40 eliminated all size-control-related issues, he says.
Read Next
5 Rules of Thumb for Buying CNC Machine Tools
Use these tips to carefully plan your machine tool purchases and to avoid regretting your decision later.
Read MoreBuilding Out a Foundation for Student Machinists
Autodesk and Haas have teamed up to produce an introductory course for students that covers the basics of CAD, CAM and CNC while providing them with a portfolio part.
Read MoreRegistration Now Open for the Precision Machining Technology Show (PMTS) 2025
The precision machining industry’s premier event returns to Cleveland, OH, April 1-3.
Read More


.jpg;maxWidth=300;quality=90)


