Accuracy Of Grinding Cell Eliminates Selective Assembly Of Bearings
Following a sustained period of growth, 600 Group subsidiary Gamet Bearings has invested in a new grinding cell to increase capacity, improve bearing accuracy, reduce costs and improve both process consistency and customer satisfaction.
Share


Following a sustained period of growth, 600 Group subsidiary Gamet Bearings has invested in a new grinding cell to increase capacity, improve bearing accuracy, reduce costs and improve both process consistency and customer satisfaction.
In the specialized world of high-precision tapered roller bearings, Colchester, England-based Gamet Bearings is one of the world leaders. With technology originally developed in France and transferred to the United Kingdom by the 600 Group more than 50 years ago, Gamet has become the premier supplier of these bearings to numerous machine tool builders and other specialized applications.
The recent growth of “teach” type lathes such as the Harrison Alpha and the Colchester Combi, the 2001 acquisition of the Gamet business in France and the rapid growth in overseas markets have created a strong demand for these specialized bearings. This growth put pressure on existing manufacturing processes, many of which dated back 50 years and relied on selective assembly techniques to achieve the desired precision.
In particular, the hollow ground steel rollers, of which there are typically 23 in each bearing, need to be produced to tolerances of ±1 micron for size and taper. Prior methods could only achieve ±10 microns, so a worldwide search was conducted to find a machine capable of grinding rollers to the required tolerance without the need for selective assembly. Trials were conducted over a period of 2 years to find a suitable CNC cylindrical grinder that could consistently achieve Gamet’s exacting demands.
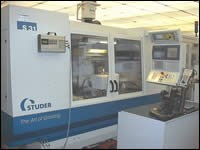
Working closely with Curtis Machine Tools (CMT), a local Colchester firm, an automatic load/unload station was specified complete with a vision system for roller orientation and 100 percent part inspection. This system is integrated with a S31 cylindrical grinder from Studer (sold in the United States by United Grinding of Miamisburg, Ohio). This machine is equipped with a precise workhead and incorporates a Movomatic gaging system. The new cell is located in Gamet’s air-conditioned precision grinding facility.
Blank roller bearings are produced on a Colchester Tornado A50 CNC lathe. Both faces and the tapered OD are turned on this machine. The center hole is also drilled. Finally, the opening at the wide end of the tapered blank is “knobbled,” an unusual drilling process that creates a three-lobed shape at that end of the blank’s center hole. The three high points of the lobed opening become important when the blank is mounted between centers on the grinder.
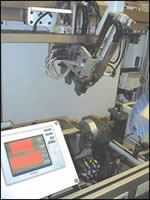
Turned blanks are then transferred to the grinding cell, where they are loaded into a bowl feeder. A robotic pick-and-place device randomly loads the blanks into the CMT vision system for an initial rough dimensional check to be sure that the blanks have adequate but not excessive stock for the grinding operation. In the dimensional check, the vision system measures four points on each blank. These include two points on the diameter and two points on the length.
A blank that does not pass this inspection is assumed to be loaded backwards, so the robot turns it around for a second check by the vision system. If the blank passes, then it is assured of having a suitable stock condition and proper orientation for loading in the grinder. Blanks that do not pass this second inspection are automatically ejected from the grinder, which is a rare occurrence according to Gamet production staffers.
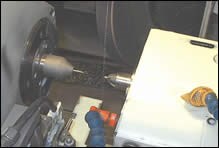
Inside the work area of the grinder, blanks are mounted between centers by the robotic grippers. The grippers have two sets of jaws, one set to load a blank, the other set to unload a finish-ground roller. The workholding technique on the grinder is a critical part of the precision-grinding process.
The wide end of the tapered blank is presented to the dead center on the right. The dead center features a roundness of less than 0.2 micron to ensure high roundness of the bearing. The three high points of the center hole create a three-point contact with the dead center, establishing a positional stability that has been likened to that of a three-legged stool. A similar principle has been applied to the opposing “slow taper” drive center. Here, three-point contact is achieved by three flats on the drive center.
The grinding process itself is divided into two progressive phases. In the first, the feed rate of the grinding wheel is positioned high to perform a kind of rough grinding operation in which efficient material removal is the goal. In the second phase, feed rate of the grinding wheel is reduced for a precision-finish grinding operation. However, at this point, the probes of the automatic gaging system are deployed. One probe touches the ground face of the roller as a datum surface, while calliper probes touch opposite surfaces of the OD.
Software in the gaging system simultaneously monitors the size of the OD and its relationship with the datum surface. When the OD reaches its nominal dimension, wheel feed is automatically adjusted for a final spark-out cycle to complete the roller. Thus, the outside diameter, taper and datum face are all machined in a single operation. The whole process, including load and unload, takes less than 40 seconds and is 100 percent confirmed by the in-process gaging capability in the grinding cell.
A camera within the machine enclosure is connected to the Internet so that the cell can be monitored remotely overnight and during weekends. Production supervisors take turns handling this duty, allowing the cell to operate virtually around the clock.
According to Manufacturing Director Tony Tankard, who was responsible for installation of the grinding cell, the foundation for its accuracy is the underlying rigidity of the Studer grinding machine. He believes that the Granitan composite base provides the vibration damping and thermal stability that allow submicron accuracies to be achieved on a day-in, day-out basis. He also reports that the reliability of the cell has been outstanding, with no downtime other than for scheduled maintenance in more than 32 months of continuous operation.
“This cell has transformed our factory and brings us right into the 21st century,” comments Gerry Shrimpton, Gamet’s general manager and director. “This is a very important investment for both Gamet and the 600 Group. We spent more than 2 years making sure that we had the right approach and equipment, but it was worth it. “
According to Mr. Shrimpton, the cell operates unattended for periods of 24 hours, occupies two thirds of the floor space of the previous system and has allowed five people to be redeployed within the company. Throughput time has reduced from 2 weeks to 24 hours. He says the system has paid for itself within 30 months. “Customer benefits such as more accurate, more consistent bearings with improved performance and quicker delivery are even more important to us,” he says.
Read Next
5 Rules of Thumb for Buying CNC Machine Tools
Use these tips to carefully plan your machine tool purchases and to avoid regretting your decision later.
Read MoreSetting Up the Building Blocks for a Digital Factory
Woodward Inc. spent over a year developing an API to connect machines to its digital factory. Caron Engineering’s MiConnect has cut most of this process while also granting the shop greater access to machine information.
Read MoreRegistration Now Open for the Precision Machining Technology Show (PMTS) 2025
The precision machining industry’s premier event returns to Cleveland, OH, April 1-3.
Read More


.jpg;maxWidth=300;quality=90)


