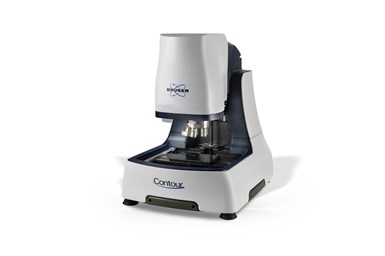
Bruker Releases New ContourX 3D Optical Profilometers
Bruker’s new generation of ContourX 3D Optical Profilers leverages a range of software and design enhancements to improve usability, field of view and nanoscale performance.
Share


.png;maxWidth=45)
DMG MORI - Cincinnati
Featured Content
View More

Hwacheon Machinery America, Inc.
Featured Content
View More


Bruker has released its next-generation benchtop ContourX 3D optical profilometers for gage-capable surface texture and roughness metrology in R&D and manufacturing environments. The white light interferometry (WLI) platform features Bruker’s new USI universal scanning mode for automatically determining the measurement parameters for optimal metrology results, as well as an advanced PSI mode for lower-noise measurements and a subnanometer Z resolution. A 5MP camera and overhauled stage design increases the machines’ large-area stitching capabilities, allowing it to collect 1,000 high-resolution stitched fields. Bruker says this combination of features and capabilities enables greater convenience and productivity in demanding research and industrial applications such as automotive and aerospace, to conducting highly accurate measurements for precision machining, cosmetics and semiconductor manufacturing.
The ContourX family of profilometers is available in three benchtop models, each with a range of capabilities and price points targeted to individual metrology and budget requirements. Software enhancements include Bruker’s new VisionXpress interface, which the company says provides simple and intuitive access to the full power of the award-winning Vision64 analytical software suite — and which it says will make these profilers ideal for multi-user environments. The latest version of VisionMAP software further complements those features with customized reporting capabilities and advanced analysis solutions.
Related Content
-
Parts and Programs: Setup for Success
Tips for program and work setups that can simplify adjustments and troubleshooting.
-
4 Ways to Establish Machine Accuracy
Understanding all the things that contribute to a machine’s full potential accuracy will inform what to prioritize when fine-tuning the machine.
-
Help Operators Understand Sizing Adjustments
Even when CNCs are equipped with automatic post-process gaging systems, there are always a few important adjustments that must be done manually. Don’t take operators understanding these adjustments for granted.


.png;maxWidth=150)


.jpg;maxWidth=300;quality=90)


