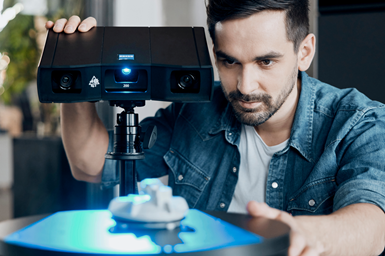
Blue Light 3D Scanner Digitizes Small, Medium Objects
Capture 3D offers GOM Scan 1, a precise blue light 3D scanner for digitizing small and medium-sized objects.
Share


ECi Software Solutions, Inc.
Featured Content
View More
Capture 3D, measurement solution provider and the U.S. partner for GOM GmbH (a ZEISS company), now offers a precise blue light 3D scanner. The GOM Scan 1 features mesh editing capabilities to accurately digitize small to medium-sized physical objects into high-quality data using GOM blue light 3D scanning technology.
The scanner is designed to be compact, weighing 2.5 kg. Accessory options include a desk stand for mounting and an automated rotation table. It offers three measuring volumes: 100, 200 and 400 mm field of view.
The noncontact blue light 3D scanner uses fringe projection technology to capture full-field data with narrowband blue light. Data is recorded by two cameras, with a powerful light source that enables short measuring times and filters out interfering ambient light during data acquisition. This principle allows the sensor to recognize and compensate for changing ambient conditions. Its software also continuously monitors the calibration status, transformation accuracy, environmental changes and part movements.
GOM Scan 1 is suitable for applications such as creating a digital file of an object for 3D printing, reverse engineering, manufacturing, quality control, virtual display and 3D modeling, research and education and more. It uses GOM Inspect 3D inspection software to capture, visualize and analyze 3D measurement data within the same workflow.
GOM Inspect delivers a 3D measurement experience said to provide practical advantages for modern digital engineering applications. For example, its mesh editing software functions allow users to smooth, thin and refine polygon meshes, fill holes and extract curvature lines, resulting in accurate meshes that support the reproduction of parts, creation of 3D models, development of new products, and 3D printing and reverse engineering applications. The smart polygonization software feature creates a detailed mesh while keeping its size compact by importing and aligning CAD and mesh files to create surface comparisons and dimensional inspections and generate reports. These meshes can be saved in standard formats, including STL, G3D and POL.
Related Content
-
Help Operators Understand Sizing Adjustments
Even when CNCs are equipped with automatic post-process gaging systems, there are always a few important adjustments that must be done manually. Don’t take operators understanding these adjustments for granted.
-
Ballbar Testing Benefits Low-Volume Manufacturing
Thanks to ballbar testing with a Renishaw QC20-W, the Autodesk Technology Centers now have more confidence in their machine tools.
-
4 Ways to Establish Machine Accuracy
Understanding all the things that contribute to a machine’s full potential accuracy will inform what to prioritize when fine-tuning the machine.

.JPG;width=70;height=70;mode=crop)


