ANCA's Software Features Total Tool Runout Compensation
The latest update in ANCA’s ToolRoom software contains a total tool runout measurement and compensation operation, an addition to its existing axial runout compensation.
Share


Hwacheon Machinery America, Inc.
Featured Content
View More


.png;maxWidth=45)
DMG MORI - Cincinnati
Featured Content
View More

ECi Software Solutions, Inc.
Featured Content
View MoreANCA’s latest update to its ToolRoom software has an option to apply complete tool runout compensation.
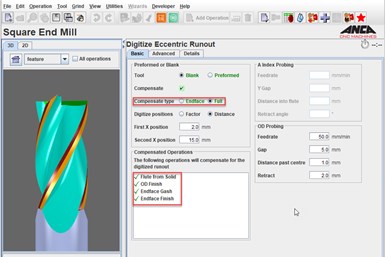
On an ANCA tool and cutter grinder, runout is measured by rotating the blank around the A-axis (headstock) and using a Renishaw touch probe. The latest update in ToolRoom RN34.1 contains the total tool runout measurement and compensation operation in IGrind, an addition to the existing axial runout compensation.
The runout measurement and compensation can be performed on a blank or a pre-formed blank. A pre-formed blank is a tool that has flutes ground; for example, tools requiring re-sharpening. Endface compensation is used for axial runout by digitizing a single point close to the end of the tool.
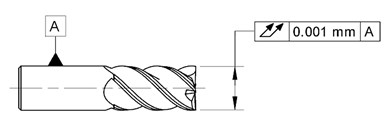
Total runout or full compensation will measure and compensate radial and axial runout. This is mainly used while manufacturing and two points are digitized. One is near the end of the tool and the other at shank end. With the digitized results, users can convert the grinding to the centerline of the blank rather than the centerline of the A-axis.
According to ANCA, runout in drills and reamers will result in oversized holes, which can be avoided by using the runout compensation. Manufacturing challenges due to runout is a persistent issue for many precision tool manufacturers, and ANCA says it hopes to address this problem with the new software features. The new complete tool runout measurement and compensation operation is now available as an option in the latest ToolRoom update for RN34.1 release. ANCA says customers will benefit from reduced collet and collet adaptor setup time and reduced scrap.
Related Content
-
Ballbar Testing Benefits Low-Volume Manufacturing
Thanks to ballbar testing with a Renishaw QC20-W, the Autodesk Technology Centers now have more confidence in their machine tools.
-
Help Operators Understand Sizing Adjustments
Even when CNCs are equipped with automatic post-process gaging systems, there are always a few important adjustments that must be done manually. Don’t take operators understanding these adjustments for granted.
-
Rethink Quality Control to Increase Productivity, Decrease Scrap
Verifying parts is essential to documenting quality, and there are a few best practices that can make the quality control process more efficient.


.jpg;maxWidth=300;quality=90)


