Seeing Is Believing
Microscopes play an important role in part inspection and measurement.
Share


Autodesk, Inc.
Featured Content
View More

.png;maxWidth=45)
DMG MORI - Cincinnati
Featured Content
View More
The human eye is a pretty good discriminator when it comes to size. When two objects are placed side by side, it’s often fairly easy to determine the difference in size simply by visual comparison. In fact, with one part used as a standard, a good, young set of eyes (not mine) can pretty easily pick up a couple of millimeters’ difference in the sizes of the parts.
For smaller differences, microscopes can play an important role in part inspection and measurement. In fact, manufacturers employ a variety of types of microscopes, depending on whether they need to visually evaluate the part or dimensionally measure the part. There are different microscopes made just for these specific purposes.
Inspection microscopes are designed to answer questions about the visual quality of a part, such as: “Are there too many pits or scratches?” “Is the color right?” “Are the mating parts aligned properly?” For parts with smaller details than can easily be seen, microscopes can be used to magnify the object to make it easier to examine. Magnification refers to the degree to which a part image has been enlarged. One often assumes that higher magnification means better image definition—i.e., higher resolution and better accuracy—but this is not always the case.
Basically, a microscope consists of a pair of magnifying lenses at a specific distance apart. Typical magnifications of toolroom microscopes range between 10× and 150×. With this level of magnification, it becomes easy to examine parts for flaws and other quality characteristics. Microscopes can also aid the assembly process. Placing diamonds on contacts or other delicate assembly processes can be greatly facilitated by the use of these simple magnifying tools.
However, inspection microscopes are not designed to answer quantitative questions such as: “How long is this piece?” “What is the thread pitch of this screw?” or “How deep is this hole?” To answer these questions, a measuring microscope is required.
Basic measuring microscopes use the human eye to compare specific features on the part against dimensional standards that are built into the microscope. The most basic measuring microscope combines the magnifying inspection microscope with a precise XY table with scales that monitor the position of the part. This is often referred to as “stage movement measurement” because the feature to be measured doesn’t fit in the field of view as seen through the lens. Typically, a linear scale or a rotary encoder inside a drum micrometer measures stage displacement as the object on the stage moves past a reference point, usually a cross line, in the eyepiece. By placing crosshairs on one edge and then moving the part to the next edge, the user can read the scales to get the dimension of the characteristic being measured.
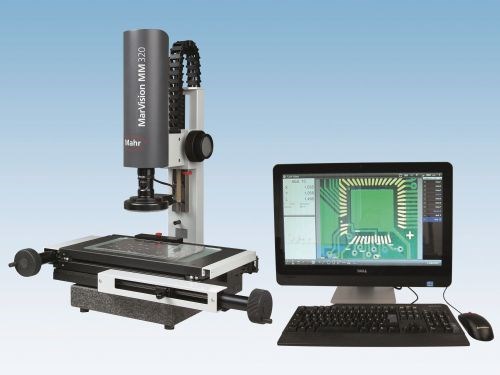
But today’s measuring microscopes no longer require a user to look through the lens or match up a set of crosshairs on the part. The eyepieces have been replaced by CCD cameras, and software keeps track of the scales in the XY tables to provide semi-automated or automated part measurement.
Today’s microscopes offer the best resolution, the greatest optical versatility and the broadest magnification range available. And what’s also great is that most microscopes are assembled in modular, building-block designs, allowing for a wide range of sizes and capabilities specifically suited to end users’ needs.
Also, software-enriched measuring microscopes have unparalleled features to store part programs and automate the measuring process, automatically detecting part edges so that the operator is virtually eliminated from the process and greatly improving the performance of the system. Throw in the capability to document and store measured data, and you have powerful measurement tools right at the point of manufacture.
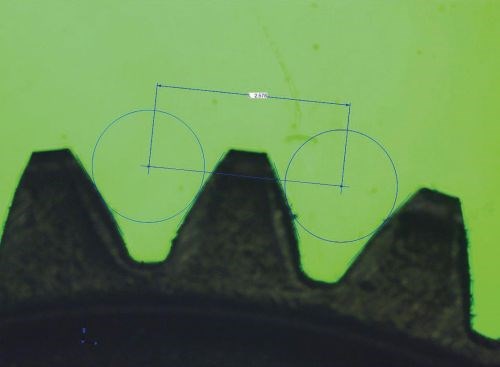
Finally, as optics and the size of the area visible in the field of view improve, the need to rely on a stage movement microscope diminishes. With field-of-view measurement, software part recognition replaces the eyepiece crosshairs that were manually placed on the part. Instead, the part is recognized by the machine, and all the features are measured automatically, regardless of part orientation or how many parts are placed in the field of view of the microscope.
With so many choices available today, the microscope you select should be chosen for the tasks for which you intend to use it. The right microscope can provide a tool capable of meeting your visual inspection or dimensional measurement needs for years to come.
Read Next
Registration Now Open for the Precision Machining Technology Show (PMTS) 2025
The precision machining industry’s premier event returns to Cleveland, OH, April 1-3.
Read More5 Rules of Thumb for Buying CNC Machine Tools
Use these tips to carefully plan your machine tool purchases and to avoid regretting your decision later.
Read MoreBuilding Out a Foundation for Student Machinists
Autodesk and Haas have teamed up to produce an introductory course for students that covers the basics of CAD, CAM and CNC while providing them with a portfolio part.
Read More


.png;maxWidth=150)


.png;maxWidth=300;quality=90)


