Volumetric Accuracy Is Key to Machining James Webb Telescope
Sponsored ContentTo meet the extreme tolerance of the telescope’s beryllium mirrors, the manufacturer had to rely on stable horizontal machining centers with a high degree of consistency volumetric accuracy.
Share
The James Webb Space Telescope (JWST) is an optical telescope produced and recently deployed by NASA. It orbits the Earth at a distance roughly four times farther than the moon, hiding from the sun in our planet’s shadow. Deployed this year, it is the largest orbiting telescope ever produced, and both its size and complexity provided numerous manufacturing challenges.
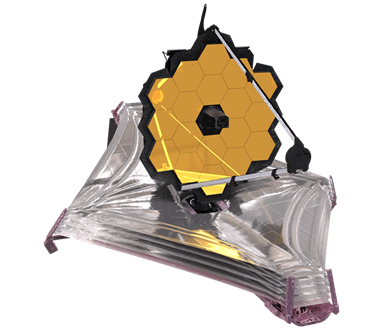
The James Webb Space Telescope is the most advanced orbital telescope in history. Each of the 18 hexagonal beryllium mirror segments in its primary mirror assembly were machined by Axsys Technologies using horizontal machining centers supplied by Mitsui Seiki. Photo Credit: NASA
The telescope is designed to observe infrared light in order to detect objects billions of lightyears away from Earth, which meant it needed a highly specialized mirror for detecting that light. This mirror is comprised of 18 gold-plated, hexagonal beryllium segments arranged hexagonally and kept at -223°C. Each segment is 1.5 meters in diameter and had to be machined to a specific curvature such that it would deform into the proper shape once it underwent the cooling process to achieve its operational temperature.
To achieve this, NASA turned to three-axis horizontal machine tools from Mitsui Seiki.
Extreme Tolerances, Expensive Material
Axsys Technologies of Rocky Hill, Connecticut, won the job of machining the beryllium mirrors in September, 2003, and began delivering them in 2006. The final mirror was delivered for polishing in 2007, 14 years before the telescope launched. The company built a 20,000-foot climate-controlled facility to house the production line for the mirrors and immediately began researching machine tools for the job.
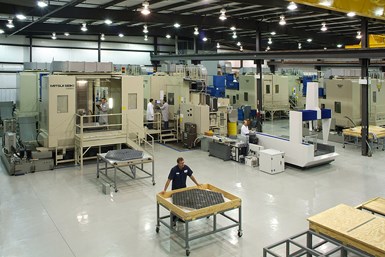
Axsys installed each Mitsui Seiki HMC on a meter-thick concrete pad surrounded by sand to prevent outside vibrations from interfering with machining. The toxic beryllium dust meant each machine to be equipped with dust management systems for worker safety. Photo Credit: Mitsui Seiki
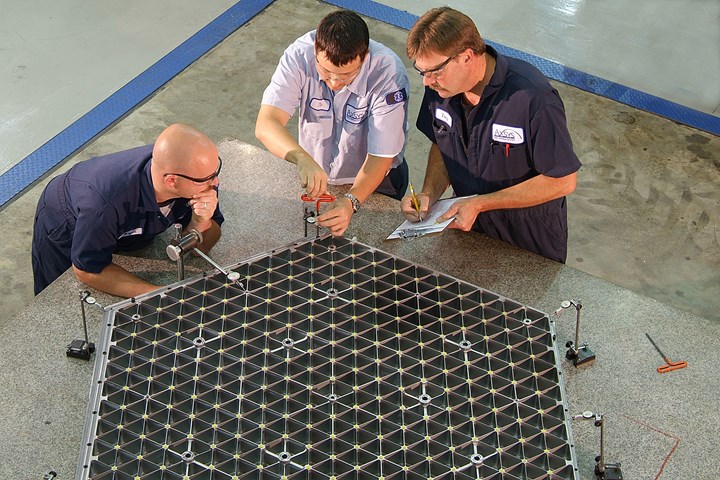
While the beryllium’s thermal stability made it ideal for the mirrors, the material is very expensive (each 750-pound billet cost $500,000), and the dust is a toxic safety hazard for workers. This meant that scrapped parts were unacceptable, and dust management was a necessity. Additionally, the mirrors required heavy machining, removing 670 pounds of material. The back of the mirror, where it would attach to mounts on the telescope, required the machining of 600 pockets with eight different rib structures ranging in thickness from 0.021 to 0.2 inches. On the side with the mirror finish, there was a ± 0.0002-inch tolerance, and there were three different mirror-segment types with different mirror geometries.
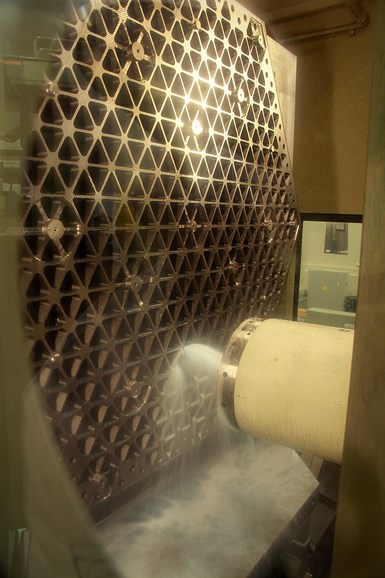
The mirrors required the removal of over 600 pounds of material, including the machining of 600 triangular pocket in the back. There are eight different rib structures, with holes drilled at intersections for mounting on the telescope. Photo Credit: Mitsui Seiki
Volumetric accuracy – a machine tool’s ability to maintain positional accuracy in a three-dimensional space – was a major issue. “The process we went through to select the machines was one that we developed over quite a few years,” said Axsys General Manager Martyn Acreman. “Obviously, price and delivery were factors, but the main factor was machining capability, especially volumetric accuracy.” While the tolerance might seem tight, but achievable, maintaining that tolerance while machining precise contours over 2.25 square meters is extremely difficult.
Altogether, machining these mirrors involved heavy material removal and tight tolerances, with each mirror ultimately taking 18 weeks of machining time, with additional time spent on polishing, heat treating and inspection. To machine these mirrors, Axsys needed machine tools that were reliable, had excellent volumetric accuracy, and could be customized to manage the toxic dust.
Ultimately, the company purchased eight HS6As from Mitsui Seiki.
Volumetric Accuracy and Complex Machining
The specific machine the company chose was the Mitsui Seiki HS6A HMC, which was modified to manage dust particles. Additionally, the company slightly reduced the Z-axis from 1,000 to 980 millimeters to accommodate the large billets. Each machine had a 20-ton bed and 11-ton column to reduce vibration and maintain precision. Axsys installed each machine in a concrete pad 1 meter-thick poured into the floor, isolating each pad in a bed of sand to prevent outside vibrations from disturbing the machining.
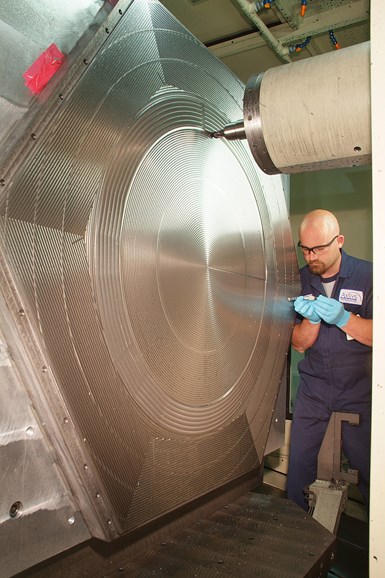
There were three mirror types with different curvatures, each of which was 1.5 meters across. The challenge of maintaining positional accuracy in three dimensions over that area and with a tolerance of 0.0002 inches necessitated a machine tool with Mitsui Seiki’s volumetric accuracy. Photo Credit: Mitsui Seiki
The HS6A had numerous advantages for these parts. First and foremost, it was large enough to accommodate the size of the part. Additionally, the machine is capable of volumetric positioning with an accuracy within a few microns over the entire work envelope. This level of precision is absolutely necessary to produce such large mirrors with distinct curvatures and a tolerance of ±0.0002 inches. Mitsui Seiki has a history of producing machines with exacting volumetric accuracy that enables this level of precision over a large area.
“The machines needed to position and travel in a very specific manner,” said Mitsui Seiki USA President Scott Walker. “Axsys was trying to have consistent cutting because machining generates a lot of stress on the part, and they’re taking a lot of material out.” This meant the machine had to maintain consistent cutting conditions, and the servomotors had to control the toolpath smoothly. Once again, this mean volumetric accuracy was key.
Mitsui Seiki builds its machine tools in a temperature- and humidity controlled factory to maintain reliable accuracy for every component. According to Mitsui Seiki Northwest Regional Sales Manager Eric Wold, the company focuses on attaining excellent three-dimensional accuracies: yaw, pitch, roll and squareness. “Linear positional accuracy errors can be corrected with the CNC control,” he said. “Geometric errors (yaw, pitch, roll and squareness) are all angular errors. A CNC controller cannot correct for three-dimensional geometric accuracy errors.”
Machining these mirrors required meeting tight tolerances and maintaining volumetric accuracy beyond what can be achieved by many machine tools. Mitsui Seiki’s dedication to excellence at every stage of machine production made this difficult job doable.
Photo Credit: Mitsui Seiki
To achieve the three-dimensional accuracy needed, Mitsui Seiki hand-scrapes its ways. This is an intensive process that involves hours of hand-scraping, fitting and measuring to achieve the desired precision. If measurements find any imprecision in the positional accuracy, it goes right back to hand-scraping. “By building the accuracies into the machine tool casting and ways, Mitsui Seiki can hold three-axis volumetric accuracy at under 0.0025 millimeters and five axis volumetric accuracy under 0.025 millimeters,” said Wold. “Precision hand scraping also makes the whole structure more rigid, allowing for tighter fitting sliding guideways.”
This craftsmanship is key to the machines’ consistency and volumetric accuracy. Ultimately, the shop purchased eight customized HS6As and produced 20 mirrors, two more than required. Now, every image that comes back from the JWST owes its clarity in part to the hand-scraped ways of a Mitsui Seiki machine tool.
For more information, visit mitsuiseiki.com.
