Shopfloor CMM Reduces Production Bottlenecks
By adding a shopfloor CMM from Hexagon Metrology to its production process, Senga Engineering has increased quality and reduced production bottlenecks.
Share


ECi Software Solutions, Inc.
Featured Content
View More
.png;maxWidth=45)
DMG MORI - Cincinnati
Featured Content
View More
Takumi USA
Featured Content
View More
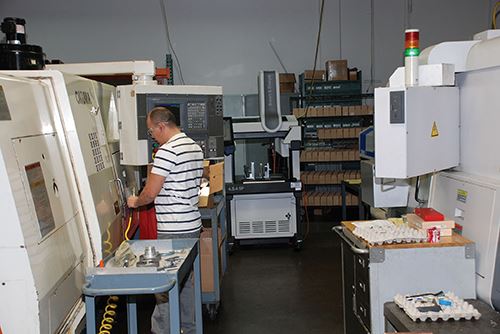
Although most shops welcome the opportunity to take on additional work, growth isn’t always easy—especially when a particular process is at capacity. Senga Engineering (Santa Ana, California) ran into this problem when one of its customers wanted to boost its workload. According to Project Manager Pat Anaya, there was no way Senga’s inspection system and process could meet the demand. However, after installing a portable coordinate measuring machine (CMM) from Hexagon Metrology Inc. (North Kingstown, Rhode Island), the company was able to eliminate inspection bottlenecks and ensure on-time delivery.
Founded in 1979, Senga Engineering is a provider of precision-machined components in the connector, aerospace and medical industries. For this particular customer, Senga manufactures three safety-critical parts for compressed natural gas fuel tanks used in alternative energy vehicles—all of which require 100 percent traceability.
According to Mr. Anaya, inspecting these parts was labor intensive, especially when trying to accumulate and record data on 100 percent of key characteristics. To increase the production capacity necessary to take on more of this work, the company would have to improve its quality control process.
So Senga assembled an internal team that explored the company’s daily workflow. This team determined that part inspection and the ability to populate reports directly on the shop floor rather than offline in a quality department could help deliver on-demand accept/reject criteria for part inspection and reduce inspection bottlenecks.
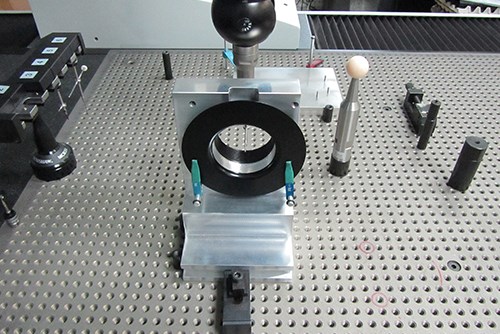
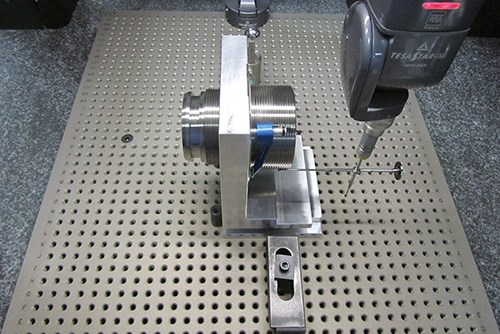
To accomplish this, the company invested in Hexagon Metrology’s 4.5.4 SF CMM designed for harsh shopfloor environments and manufacturing cells. Its small footprint and roll-around stand enable it to go anywhere in the shop where precise dimensional inspection is required. It uses a standard 110/120-volt outlet without the need for shop air. Other features include advanced thermal compensation, covered ways and built-in vibration resistance.
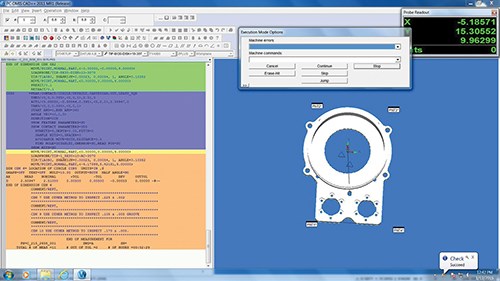
In the early stages of setting up the CMM cell, Mr. Anaya says Senga still had a moving target and difficulty determining what format would best accumulate data, so the Hexagon Metrology team developed a software utility to help the company accomplish its goal. This custom application takes the measurement results from serialized parts and pushes the data up to a file on the server. After a plating operation, those same parts are inspected with the CMM. The before and after plating measurements for the serialized parts then populate the customer’s reports, detailing 100 percent inspection results. Using PC-DMIS STI+ (single touch interface), a touchscreen interface and integrated software, Senga can immediately react to process variation on the floor to reduce scrap and increase productivity.
PC-DMIS STI+ guides the user through part setup and measurement, then populates inspection reports with measurement data for immediate action. Senga can run pre-programmed inspections and review reports without directly interacting with the underlying PC-DMIS software. To start the process, the user selects the part from a graphical list, and the software displays a picture of how to fixture and align the part. After inspection, a graphical report shows features of interest, noting if they meet specifications.
The head of Senga’s quality department can now review inspection reports and immediately address production anomalies. For example, a Senga operator checks 22 features on the adapters for natural gas fuel tanks, half of which are critical. With shopfloor data automatically populated into the reports, any deviations or manufacturing issues are red-flagged immediately. The inspection data is then compared with the associated CAD data in the quality lab for further analysis and resolution. By eliminating the potential for human error, the integrity of the data is not compromised and the customer can have full confidence in the parts.
After the success of its first CMM integration, Senga purchased a second 4.5.4 SF CMM for another customer’s parts six months later. The company is now working to introduce the new quality control process into other part numbers and families to eliminate hands-on inspection when possible. This will enable it to catch and address more problems on the shop floor at the machine level.
Senga is also in the process of implementing statistical process control (SPC) with PC-DMIS DataPage+ to create a centralized repository for measurement data. SPC will also help the company spot trends and analyze the ability of the process, the machine and the entire operation as a whole. Using DataPage+, Senga can set custom polling intervals for incoming data, which enables it to monitor important processes in real-time. Individual features can be monitored on the “feature monitor” screen, enabling shopfloor operators to quickly see if processes are running within control limits. Multiple types of charts, histograms and graphs can be generated for real-time viewing and monitoring, with drill-down capabilities for important data points.
The company also added two laptops on the shop floor that connect to the company server. DataGauge+ hand gage interface software is installed on both laptops, and an eight-way multiplexer box is used to run as many as eight digital manual gages. This paperless setup enables machinists to perform manual measurements on the fly and push the data directly to the same DataPage+ database used by the entire facility.
According to Senga President Roy Jones, the CMM has made the company more profitable and reduced costs in less than a year. He explains that the CMM has enabled Senga to collect a lot of data on the shop floor without hiring another inspector or purchasing additional CMMss for the inspection lab. It also enables the company to provide professional inspection data to its customers without the potential for errors associated with manual data collection.
As an added benefit, the learning curve was short for Senga’s operators to adjust to the 4.5.4 SF. In fact, Mr. Anaya says the new CMM technology incorporated into a manufacturing cell led to more engaged operators.
“I can’t explain it. Maybe it is because they are involved in new technology rather than simply pushing buttons,” he says. “Or, it could be that they see what the data is, and they are not physically having to touch and measure the part and grab the tools. They view what is good and bad on the computer screen. They understand their parts and know what to do right away. It just makes them better operators—they are more engaged, and are more accountable to the manufacturing process, which is more powerful than being disciplined. The quality of the work is consistent, and it is consistently good.”
Additionally, the new inspection system has forced Senga to standardize its workflow, from the fixtures to the program and the inspection method. The company conducts weekly production meetings to review its backlog, looking out four weeks at a time. This effort helps uncover potential issues that can jeopardize on-time performance, which the company tracks and charts.
Standardizing internal guidelines, equipment and processes is helping Senga fight on-time delivery issues. With a better process flow, scrap issues are found up front during production, rather than on the back-end after many parts have been manufactured. Fixing errors upstream has enabled the company to make on-time delivery—in some cases, a week ahead of time.
Related Content
Ballbar Testing Benefits Low-Volume Manufacturing
Thanks to ballbar testing with a Renishaw QC20-W, the Autodesk Technology Centers now have more confidence in their machine tools.
Read MoreThe Link Between CNC Process Control and Powertrain Warranties
Ever since inventing the touch-trigger probe in 1972, Sir David McMurtry and his company Renishaw have been focused on achieving process control over its own manufacturing operations. That journey has had sweeping consequences for manufacturing at large.
Read MoreOrthopedic Event Discusses Manufacturing Strategies
At the seminar, representatives from multiple companies discussed strategies for making orthopedic devices accurately and efficiently.
Read MoreHelp Operators Understand Sizing Adjustments
Even when CNCs are equipped with automatic post-process gaging systems, there are always a few important adjustments that must be done manually. Don’t take operators understanding these adjustments for granted.
Read MoreRead Next
Building Out a Foundation for Student Machinists
Autodesk and Haas have teamed up to produce an introductory course for students that covers the basics of CAD, CAM and CNC while providing them with a portfolio part.
Read More5 Rules of Thumb for Buying CNC Machine Tools
Use these tips to carefully plan your machine tool purchases and to avoid regretting your decision later.
Read MoreRegistration Now Open for the Precision Machining Technology Show (PMTS) 2025
The precision machining industry’s premier event returns to Cleveland, OH, April 1-3.
Read More


.png;maxWidth=150)


.jpg;maxWidth=300;quality=90)


.jpg;maxWidth=300;quality=90)


