Scanning CMM Gets Auto Parts To Market With Speed, Accuracy
In the game of darts, the bull's eye is 4 cm in diameter. It doesn't matter where the dart hits inside the bull's eye—dead center, slightly to the left or right of dead center—to score points, as long as it lands within the 4-cm circle.
Share


In the game of darts, the bull’s eye is 4 cm in diameter. It doesn’t matter where the dart hits inside the bull’s eye—dead center, slightly to the left or right of dead center—to score points, as long as it lands within the 4-cm circle.
In manufacturing, quality technicians verifying part dimensions aim for tolerances as small as 0.005 mm. Hitting the inspection bull’s eye is a skill that varies depending on experience and measurement equipment. That’s why manufacturers continually look for opportunities to take surprises out of processes and parts production.
Mike Rovillo, senior quality engineer at auto parts manufacturer VDO North America (Cheshire, Connecticut), knows how tricky it can be to measure microscopic dimensions. VDO manufactures automotive parts, including fuel pump components, idle air controls and seatbelt sensors, for General Motors, Ford, DaimlerChrysler and some European and Japanese automakers. He recently needed to find an inspection system within 60 days that could conduct part measurements for a prototype fuel pump.
“We needed to launch the new fuel pump on a very aggressive timeline,” Mr. Rovillo says. “I had to research what was available on the market to measure the parts and then buy the equipment.”
The demanding development timeframe required a measurement system investment that would create immediate returns in the form of accuracy, speed and consistency. Mr. Rovillo also added process control requirements to the list of criteria.
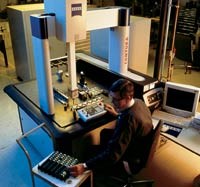
In May 2000, VDO purchased a Contura scanning coordinate measuring machine (CMM) from Carl Zeiss IMT Corporation (Minneapolis, Minnesota) to measure fuel pump prototypes. The Contura’s scanning technology and flexibility for measuring a wide range of part dimensions in an automated environment assured Mr. Rovillo that the shopfloor system would meet VDO’s measurement needs.
“I chose the Contura CMM because of its scanning capabilities, ease of use and compatibility with other computer platforms,” Mr. Rovillo says. “I also needed a system that as many as nine different quality technicians could use to easily collect large amounts of data and utilize process signal information in a high production environment.”
The scanning CMM reduced fuel pump inspection time from 4 hours to 4 minutes. VDO also saved money because it did not need to hire additional quality technicians. Today the company conducts a variety of complex measurement tasks easily. VDO can also ensure measurement duplication between divisions and customers in its United States and European facilities.
Although VDO has a full suite of standard measuring equipment, it dedicates the Contura CMM to high volume machining support and urgent requests.
VDO has programmed the CMM to measure hundreds of fuel pump housings and covers using the Windows NT-based Calypso software. Icons and drop-down menus enable VDO quality technicians to easily develop automated inspection programs to check part diameter, concentricity, flatness or linear dimensions. The CMM prints measurement data and statistical analysis within seconds.
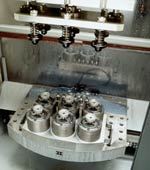
In addition, users can match Calypso file programs to manufacturing pallet sizes. At VDO, fuel pump housings and covers are palletized in groups of six and easily transfer from manufacturing to a six-piece fixture on the CMM for quick setup and measurement traceable to pallet position.
“Once the CMM is programmed to run measurement routines on a particular part, it’s easy for our operators to conduct inspections,” Mr. Rovillo explains. “We’ve been able to obtain real-time process control information based on product characteristics, which helps reduce part variation and eliminate defects.”
Due to the range of dimensional characteristics the Contura offers, VDO is measuring more part features than before. Mr. Rovillo, for example, uses the measurement probe’s self-centering feature to measure the depth and location of a fuel channel.
“If I need to measure a specific point at the bottom of a feature that I can’t see, such as a V groove or radius, the probe self-centering function indicates when I’ve reached the bottom of that part feature and accurately measures the characteristic,” Mr. Rovillo says. “This is an important capability that we didn’t have previously.”
The Contura CMM also allows VDO to fulfill special customer requests for quick measurements on new parts. For example, operators can click on a feature characteristic icon to quickly check the taper at a certain point on 20 of the same parts consecutively without developing an entire file program or doing a formal setup.
“We needed the flexibility to measure a wide range of parts in an automated environment,” Mr. Rovillo concludes. “The accuracy, repeatability and the data density we get with scanning offers all the performance we asked for and more.”
Related Content
4 Ways to Establish Machine Accuracy
Understanding all the things that contribute to a machine’s full potential accuracy will inform what to prioritize when fine-tuning the machine.
Read MoreOrthopedic Event Discusses Manufacturing Strategies
At the seminar, representatives from multiple companies discussed strategies for making orthopedic devices accurately and efficiently.
Read MoreThe Many Ways of Measuring Thickness
While it may seem to be a straightforward check, there are many approaches to measuring thickness that are determined by the requirements of the part.
Read More6 Machine Shop Essentials to Stay Competitive
If you want to streamline production and be competitive in the industry, you will need far more than a standard three-axis CNC mill or two-axis CNC lathe and a few measuring tools.
Read MoreRead Next
Building Out a Foundation for Student Machinists
Autodesk and Haas have teamed up to produce an introductory course for students that covers the basics of CAD, CAM and CNC while providing them with a portfolio part.
Read More5 Rules of Thumb for Buying CNC Machine Tools
Use these tips to carefully plan your machine tool purchases and to avoid regretting your decision later.
Read MoreSetting Up the Building Blocks for a Digital Factory
Woodward Inc. spent over a year developing an API to connect machines to its digital factory. Caron Engineering’s MiConnect has cut most of this process while also granting the shop greater access to machine information.
Read More


.png;maxWidth=300;quality=90)


.jpg;maxWidth=300;quality=90)


