Scanner Enables Fast, Flexible Inspection
When this tool and die shop sought to implement a new measurement solution, it placed a premium on portability, flexibility and accelerated inspection time. The Optigo white-light scanning system from CogniTens delivered all three. Compared with the company’s previous contact measurement solutions, the device can be used throughout the plant and enables faster collection of more comprehensive inspection data.
Share


While portable metrology solutions can provide flexibility and time savings, especially for large-part manufacturers, a busy shop floor is a challenging environment for precision measurement. A case in point is Atlas Tool, a tool and die shop that sought to improve productivity by implementing a system that could be used throughout its facility. However, with as many as 40 presses operating at any given time, vibration at the Roseville, Michigan plant was sufficient to interfere with most metrology equipment.
The company found its solution in the Optigo, a portable, white-light scanning system developed by CogniTens, a division of Hexagon Metrology based in Elgin, Illinois. The device features fast enough exposure capability to be unaffected by the constant vibration on the shop floor. Moreover, the system has reduced measurement time, and its ability to capture very detailed surface data has enabled the shop to expand its inspection capability for spin-off applications such as in-house reverse engineering and troubleshooting.
Founded in 1962 by current CEO Elizabeth Schmidt and her late husband, Markus Schmidt, Atlas Tool employs nearly 200 people for its two-shift workweek. The company caters primarily to automotive customers but also bids on aerospace and general engineering contracts. While the shop’s core competencies in tool and die remain the mainstay of its business, its capabilities have expanded during the past 45 years to include prototyping, reverse engineering and smaller production runs ranging from 100 to 1,000 parts per day. Atlas was the first company in the world registered for the QS-9000 (TE supplement) certification and the first tool and die company registered for the Ford Q1 program.
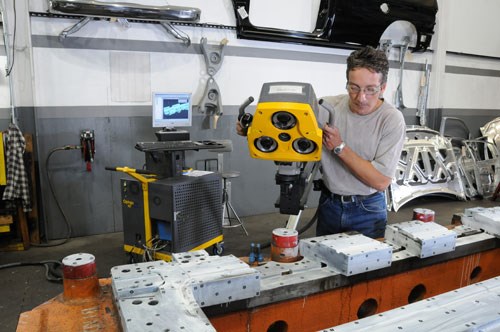
Like many manufacturers, Atlas Tool is equipped with stationary CMMs and software packages for part measurement and inspection. When the company decided to move to the next level in metrology technology, it placed a premium on portability, flexibility and accelerated inspection time. The Optigo delivered all three. Additionally, the scanner is well-suited for use in harsh industrial environments. With a flash-based light source, double-exposure capability and the ability to shoot and capture 3D surface data in less than 1 millisecond, the device is unfazed by vibration in frequencies ranging to hundreds of Hertz, according to CogniTens. Also, industrial lighting and temperature changes are said to have no effect on the system’s results.
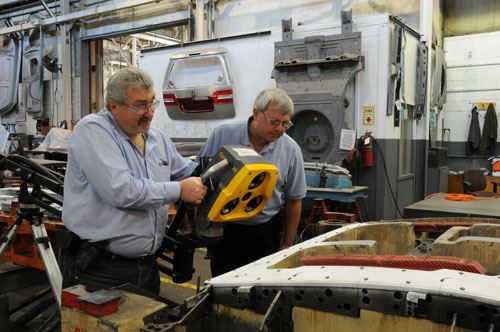
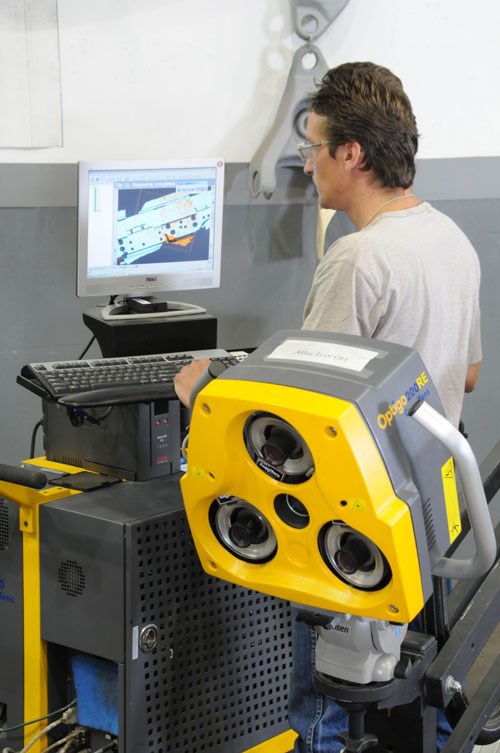
The Optigo uses three synchronized cameras to view a prescribed pattern and apply a point cloud to a surface. The system can also use a 2D image from the cameras to determine the positions and sizes of surface features such as holes, slots, edges and more. At Atlas, point clouds are processed into an STL file using Geomagic Studio inspection software from Geomagic. The STL file can then be imported into either of the company’s CAD systems: Unigraphics or Catia.
John Haas, vice president of Atlas Tool, says the non-contact system is more efficient than contact scanning equipment. That’s because linear, point-to-point contact systems are labor intensive and influenced by the skill of the operator, he notes. The white-light scanner, on the other hand, captures data in a picture and allows the shop to make better business decisions compared with measurement technologies it used in the past. "What you see is what you get," Mr. Haas explains. "From an NC and implementing design changes viewpoint, it was a godsend for us to be able to capture the existing geometry of an entire surface, not just point-to-point data gathered with CMMs."
Mr. Haas adds that a major factor in selecting Optigo was the fact that the system is flexible enough to work with virtually any software package. "In the past, we had products holding us captive to their own proprietary software, and that doesn’t work in the long term," he says.
John Watson, quality manager at Atlas, has been using the white-light scanner since the shop purchased it 2 years ago. The comprehensive nature of inspection data generated by Optigo makes the system especially useful for difficult parts, he says. Among the company’s most challenging parts are inner car doors, which have many surface twists due to varying thickness in the laser-welded steel from which they are constructed. After scanning a door, Mr. Watson can compare the CAD model to the scan data and determine exactly where these twists reside.
The system has saved considerable time during these measurement routines because inspection data can be viewed instantly as the part is scanned, Mr. Watson says. This allows inspectors to immediately perform a complete dimensional analysis of scanned data for the customer when comparing a manufactured part to the client’s CAD file and nominal design data. The system’s CoreView software displays a color-coded bar that shows which areas of the part are within or outside of required tolerances.
In addition to quality control, this capability is also useful for both reverse engineering and manufacturing replacement parts. For example, making a replacement part in the past required Mr. Watson to use a laser or take millions of points with a CMM before an engineer could surface-model the data. In contrast, the Optigo filters data directly to the CAD department as the part is scanned on the shop floor. This allows programmers to immediately begin to process the data and set up tool paths.
Scanned data can also be used for archive and retrieval purposes. CAD models derived from the data serve as master files and as the data source for CNC machining programs and other processes. If a part is damaged or destroyed, the company can now remanufacture it with finer detail than was possible in the past.
Another particularly useful application of the Optigo is the inspection of Atlas’ many presses. Inspectors periodically check the bed and ram of each press for squareness and parallelism to ensure the presses are level and flat. When press parts wear out, the company shoots the component with the scanner and reverse-engineers a digital model for in-house production.
The ability to scan parts on the production floor rather than in another area of the shop has reduced measurement time as well, particularly on very large dies. Inspectors can climb inside of large parts with the unit or even hang the scanner head from an overhead crane and obtain measurements via remote control. Replicating this work on a CMM would take much longer, inspector Mike Fortumase says.
"For every tile we shoot with the white-light scanner, there is roughly the equivalent of 400,000 CMM points," he explains. "With a contact scanning probe or a point-to-point scanner, we would need the better part of a day and a half to gather a very limited amount of data from the die. Today, the setup and shooting of a die requires only 3 or 4 hours, and there are a lot less questions from engineering because the data is so explanatory."
Related Content
How to Choose the Correct Measuring Tool for Any Application
There are many options to choose from when deciding on a dimensional measurement tool. Consider these application-based factors when selecting a measurement solution.
Read MoreThe Many Ways of Measuring Thickness
While it may seem to be a straightforward check, there are many approaches to measuring thickness that are determined by the requirements of the part.
Read MoreThe Link Between CNC Process Control and Powertrain Warranties
Ever since inventing the touch-trigger probe in 1972, Sir David McMurtry and his company Renishaw have been focused on achieving process control over its own manufacturing operations. That journey has had sweeping consequences for manufacturing at large.
Read MoreRethink Quality Control to Increase Productivity, Decrease Scrap
Verifying parts is essential to documenting quality, and there are a few best practices that can make the quality control process more efficient.
Read MoreRead Next
Registration Now Open for the Precision Machining Technology Show (PMTS) 2025
The precision machining industry’s premier event returns to Cleveland, OH, April 1-3.
Read MoreSetting Up the Building Blocks for a Digital Factory
Woodward Inc. spent over a year developing an API to connect machines to its digital factory. Caron Engineering’s MiConnect has cut most of this process while also granting the shop greater access to machine information.
Read More5 Rules of Thumb for Buying CNC Machine Tools
Use these tips to carefully plan your machine tool purchases and to avoid regretting your decision later.
Read More


