Read Your Chips: Understanding Tool Selection for Unattended Turning
Are you sure you have the best insert for that turning operation? Check the chips, especially if you are running unattended. Chip characteristics can tell you a lot.
Share


Takumi USA
Featured Content
View More


Hwacheon Machinery America, Inc.
Featured Content
View More
Autodesk, Inc.
Featured Content
View More
.png;maxWidth=45)
DMG MORI - Cincinnati
Featured Content
View MoreSome people say "reading" chips is like reading tea leaves, albeit much more rooted in science than in conjecture. If you master chip reading, you'll control throughput, turning costs, tool life and surface finish, leading to better process economics and increased process security.
These issues are particularly timely today, because many companies are operating multiple shifts to meet growing market demand and running "lights out," unattended turning operations. By interpreting chip size, shape, color, and direction, you will know how effectively your tools and machines are performing. You'll also have peace of mind regarding unattended operation, because chip disposal is controlled, smooth and reliable. Whether unattended or attended, chip formation can wreak havoc on machine uptime.
Consider the example of Metaldyne, an Ohio second-tier supplier of automotive transmission shafts, which was already running near capacity at three shifts, six days a week. Their problem was chip accumulation in the conveyor rollers, requiring operators to stop the turning center every 20 to 25 minutes for approximately 30 seconds of maintenance. Downtime added up on annual production of 150,000 shafts.
The key was to create the right-sized chips. The situation was resolved by merely switching to a higher positive rake insert optimized for the 8620 cold forged steel workpiece. As a result, the company gained confidence in their process security, saved 300 hours a year in avoided maintenance downtime, and picked up additional business with the freed-up capacity.
So, let's get right down to the basics of how to generate optimum chips in the three most common materials and operations, then how to interpret the chips.
Chip Forming 101
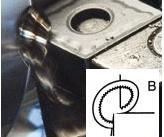
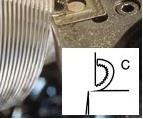
The chip formation process implies that a fresh metal interface is continually produced between the tool material and the workpiece at varying cutting forces, angles and temperatures. When a cutting edge performs its metal cutting function properly, it deforms some of the workpiece material plastically and then pushes it off. Chips separate in either of three ways: they break by themselves, they break against the tool, or they break against the workpiece.
The chips you generally want to aim for are the self-breaking kind. Chips that break against the tool can cause chip hammering and tool breakage. Those that break against the workpiece can damage surface finish. When you read a chip, match its shape, length, and color to the following guidelines:
The Long And The Short Of It
Cast iron, by its inherent chemical and physical composition, is a short chipping material. Chips spontaneously shear off into small particles that are more powder-like than particulate, causing the typical airborne cast iron dust. The appropriate color is a grayish red.
Steel chips, on the other hand, form very hard, continuous, long segments. If not properly controlled, they tend to curl into spirals or spring-like shapes. They will need help to break off into a desired shape for efficient, reliable turning and unattended chip disposal. The ideal chip should have a helical shape, that is, as in a figure 6 or 9, and measure no more than about two inches long. Its "steel" blue color indicates to the trained eye that the chip is removing sufficient heat from the work surface.
Stainless steel produces irregular or similar segments and, like steel, has a tendency to curl in continuous long segments. The ideal stainless steel chip is short, helical shaped, and is a yellow, wheat-like color.
If your present chips fit these criteria, you'll know that you're running at the appropriate machine settings, your tooling has the correct chipbreaker and insert rake angle, and you are removing the right amount of heat from the workpiece. Given the right tooling and machining data, the chips will be self-breaking. If they're not, one or more of these factors are off.
Let's now examine how workpiece materials affect chip formation.
Three Material Groups
Ninety percent of workpiece materials can be classified into cast iron, steel and stainless steel categories according to their chemical and mechanical properties.
Cast iron has the lowest shear yield strength of the three materials, thus requiring less cutting force than either steel or stainless steel. Cast iron contains 1.8 to 4.5 percent carbon and additives like silicone, magnesium, chromium, molybdenum, and copper to improve rigidity and ductility. The resulting cast iron grades range from Brinell hardness numbers (BHN) of 150 to 300. That means that even though they're all cast iron, they respond differently to turning.
The softer, highly-ductile BHN150 ferritic irons are fairly easy to turn, but can be "sticky" and prone to built-up edge at low cutting speeds. The harder, less ductile BHN280 to BHN300 ferritic/pearlitic types tend to generate higher heat, pressure and vibration. The other factor to consider in cast iron turning is abrasive hardness at the edges and corners of workpieces, which place heavier demands on the tools and inserts.
Steel fits somewhere between cast iron and stainless steel in yield strength. Carbon steels are malleable alloys of iron and carbon, with carbon content ranging from a fraction of a percent to nearly 2 percent. Carbon content determines the hardness, toughness, and the ease of chipbreaking.
Low alloy steels have less than 5 percent alloying elements, such as silicon, manganese, phosphorus and sulfur, which also affects machinability and chip formation. High alloy steels have more than 5 percent of these elements. Unalloyed steels have hardnesses ranging from BHN110 to BHN310 depending on the carbon content. By the same token, low alloy steels range from BHN125 to BHN420 when hardened. High alloy steels range from BHN150 to BHN350 when hardened. Higher carbon contents increase hardness and decrease ductility, but also are more demanding to turn than plain carbon steel.
Stainless steel has much lower thermal conductivity and higher ductility than conventional steel. The ingredients added to improve its corrosion resistance and tensile strength, especially chromium, nickel and molybdenum, give it the highest yield strength of the three materials. The results during turning are more friction, higher cutting forces and therefore higher temperatures with consequential smearing tendency and work-hardening of the component surfaces. These characteristics are typical of all austenitic stainless steel grades.
The deformation-hardened layer on incoming mill stock is considerably thicker in austenitic stainless steel than in carbon steel. The core of the material may be half as hard as the surface, but it's on the surface where the cutting takes place.
Suggestion: Compensate for the challenges of your workpiece materials. Select high positive rake inserts and chipbreakers and geometries matched to the materials, so that cutting forces work for, not against you.
Besides material, chip formation is affected by a combination of cutting data—especially feed rate and depth of cut—as well as insert lead angle, rake angle, and the tool's nose radius. Let's examine each of these factors separately.
Feed Rate
Feed rate works in conjunction with the tool's chipbreaker geometry to control chip formation. The chipbreaker geometry determines the ability of the cutting edge to form chips at varying feed rates and depths of cut.
For example, if your feed rate is too low, you'll generate long, stringy chips and they won't be self-breaking. That constitutes an immediate warning signal for unattended turning. On the other hand, if the feed rate is too high, you'll get thicker chips, resulting in chip crowding and a warning signal. Chip crowding often leads to chip hammering, crater wear, or even catastrophic edge failure. In addition, you'll require higher power consumption to form the chip.
Suggestion: For optimum material removal, maximize the depth of cut allowed by the cutting tool, then set the feed rate so that it works with your chipbreaker geometry to create the ideal chip.
Lead Angles
Lead angles affect chip flow direction, chip thickness and width.
Smaller lead angles, such as 90 degrees, approach the workpiece abruptly, require higher cutting forces and produce shorter, wider chips. Larger lead angles (30 to 45 degrees), in contrast, result in softer, smoother chip formation, less chip curl and lower cutting forces. A 45-degree lead angle distributes forces equally, that is, it produces lower cutting forces both radially and axially (entering and exiting the cut).
When you decide on insert shape, find the shape that already incorporates the required lead angle. The table below shows insert shapes with corresponding presentation angles to the workpiece and their most suitable applications. For example, for roughing, the strongest insert is round, followed by square and rectangular inserts, while for finishing, the most suitable are triangular diamond inserts.
| Factors Affecting Choice Of Insert Shape | R | 90 | 80 | 80 | 60 | 55 | 35 |
| Roughing (Strength counts here) | X | X | X | O | O | ||
| Light Roughing/semi-finishing (number of edges is important) | O | X | X | X | X | ||
| Finishing (Number of edges is important) | O | O | X | X | X | ||
| Turning and facing (Handling changes in feed direction is important) | X | O | O | X | X | ||
| Profiling (accessibility is the issue) | O | O | O | X | X | ||
| Operational versatility | O | X | O | O | X | O | |
| Limited machine power | O | O | X | X | X | ||
| Vibration tendencies (reducing them is helpful) | O | X | X | X | |||
| Hard material | X | X | |||||
| Intermittent machining (interupted cuts) | X | X | O | O | O | ||
| Small lead angle | X | X | X | X | X | ||
| Large lead angle | X | X | X | X | |||
| X = Most Suitable | O = Suitable | ||||||
Suggestion: Generally, select the smallest lead angle that the operation will allow for lower cutting forces and better chip disposal.
Nose Radius/Depth Of Cut
Nose radius and depth of cut also affect the shape and direction of chips. Small depth of cut produces spiral-shaped chips, larger depth of cut leads to comma-shaped chips. By the same token, a small nose radius generates thinner chips that are easier to push away from the workpiece. On the other hand, a large nose radius increases demands on the tool. It produces thicker chips and pushes them generally in many directions, generating higher cutting forces and requiring higher machine power for chip control.
To achieve better surface finish in finish turning, conventional wisdom says to use a larger nose radius and decrease feed rate. The flip side, however, is that larger nose radii tend to cause vibration and poor chip breaking. To ensure that you get good surface finish, a special wiper insert is recommended for high finish turning. Wiper inserts have a modified nose radius with larger corners to wipe the surface smooth, allowing you to run at up to double the recommended feed rate.
Suggestion: Select a nose radius of 3/64 inch or larger for stainless steel, steel, and cast iron turning. You'll get better chip control and disposal. For finish turning, select a WM or WF wiper insert.
Insert Rake/Geometry
The insert rake angle and size also affect the degree of chip deformation and the generation of the initial curvature of chips. A higher positive rake means more continuous cutting, smoother chip flow, lower cutting forces, lower temperatures and less deformation hardening of the material. The top face insert geometry directs chips away from the workpiece as they exit the cut.
The following example illustrates the differences encountered in interrupted-cut austenitic steel turning with a 5-degree rake angle versus a 15-degree rake angle insert. The 5-degree rake angle requires higher cutting forces, leading to fluctuations which cause waviness on the machined surface. It also produces higher heat buildup and plastic deformation against the cutting edge.
Turning with a large positive rake 15-degree angle eliminates these concerns. It reduces cutting forces, and produces a smoother surface, and better chip evacuation across the rake face.
Suggestion: Whenever possible, select state-of-the-art high positive rake inserts optimized for specific materials and operations.
Ten Selection Guidelines
To summarize, here are some general rules to assist you in generating optimum chips.
- Base your insert selection on the workpiece material and application. Also consider machine stability, horsepower and surface finish requirements.
- Rule of thumb for feed rate in turning: minimum feed rate 0.002 ipr and maximum one half of the nose radius.
- If you're losing chip control, getting chip hammering and chatter, it may be a sign that your insert chipbreaker is too open. In that case, your first recourse is to increase feed rate and/or select an insert with a tighter chipbreaker. However, the chipbreaker should not be too tight, otherwise you'll increase heat buildup leading to chip welding, edge chipping or even breakage. On the other hand, if you find that you're getting chip crowding, or the chip is crushed, or not shaped like a 6 or 9, decrease the feed rate or select a more open chipbreaker.
- If you have a specific surface finish requirement, you may not have the option of running at higher feed rates. The alternative is to select a tighter chipbreaker and maintain comfortable feeds. Usually a wiper insert will do the trick.
- If you're generating ideal chips, but getting excessive heat and tool wear, such as cratering, decrease feed rate. If crater wear continues, select an insert with a more resistant coating, such as aluminum oxide.
- Generally speaking, if chip color is off, check cutting speed. Example: if your steel chips are not deep blue, but brownish, increase machine speed. If the color is silver, it means the chips may be getting too hot. Decrease speed. In stainless steel, aim for wheat-colored chips and in cast iron for grayish-red.
- Whether you're doing heavy roughing, medium roughing or finishing, select an insert with the a nose radius of 3/64 inch or slightly larger.
- Select a minimum depth of cut of two thirds of the nose radius and maximum one third of the cutting edge length. For finishing, select cutting depths of less than one third of the nose radius.
- Generally select tools with high positive rake and tight chipbreakers for smoother chip flow, lower cutting forces, and lower temperatures. They will compensate to some extent for the deformation-hardening of the material.
- If, after following these suggestions, you're not generating optimum chips, get help from your technical sales rep, tool supplier's technical services or hotline.
Become A Chip Expert
If you run "lights out" turning operations, you can minimize concerns about chip control, throughput, surface finish, edge security and tool wear. When you run your first cuts, don't limit yourself to checking your workpiece, but also read your chips. Your chip characteristics will tell you immediately what machining data or tooling need fixing, so you can adjust them, then walk away. And, if you become a chip expert, you'll be among a minority that understands that there's more to a chip than just a piece of metal. MMS
About the author: Kathleen DeBenedictis is a Product Specialist—Turning, at Sandvik Coromant in Fair Lawn, New Jersey.
Related Content
Quick-Change Tool Heads Reduce Setup on Swiss-Type Turning Centers
This new quick-change tooling system enables shops to get more production from their Swiss turning centers through reduced tool setup time and matches the performance of a solid tool.
Read MoreOrthopedic Event Discusses Manufacturing Strategies
At the seminar, representatives from multiple companies discussed strategies for making orthopedic devices accurately and efficiently.
Read MoreThe Future of High Feed Milling in Modern Manufacturing
Achieve higher metal removal rates and enhanced predictability with ISCAR’s advanced high-feed milling tools — optimized for today’s competitive global market.
Read MoreWhere Micro-Laser Machining Is the Focus
A company that was once a consulting firm has become a successful micro-laser machine shop producing complex parts and features that most traditional CNC shops cannot machine.
Read MoreRead Next
Building Out a Foundation for Student Machinists
Autodesk and Haas have teamed up to produce an introductory course for students that covers the basics of CAD, CAM and CNC while providing them with a portfolio part.
Read MoreRegistration Now Open for the Precision Machining Technology Show (PMTS) 2025
The precision machining industry’s premier event returns to Cleveland, OH, April 1-3.
Read More5 Rules of Thumb for Buying CNC Machine Tools
Use these tips to carefully plan your machine tool purchases and to avoid regretting your decision later.
Read More


