Marine Supplier Meets Tricky Tolerances With Presetter And Measuring Machine
For its supercharged six-cylinder Verado outboard motor range, Mercury Marine (Fond du Lac, Wisconsin) set and met multiple new tolerances. One of the trickier tooling tolerances had to do with the valve seat boring tools. The company's Mazak machining centers incorporate 15 of these long, narrow, multi-insert tools to finish machine the 24-valve seats, intake and exhaust in the one-piece aluminum cylinder head. Because valve clearances are factory-adjusted and are designed to remain within tolerance for several thousand hours, close machining tolerances are essential.
Share


Hwacheon Machinery America, Inc.
Featured Content
View More


For its supercharged six-cylinder Verado outboard motor range, Mercury Marine (Fond du Lac, Wisconsin) set and met multiple new tolerances. One of the trickier tooling tolerances had to do with the valve seat boring tools. The company’s Mazak machining centers incorporate 15 of these long, narrow, multi-insert tools to finish machine the 24-valve seats, intake and exhaust in the one-piece aluminum cylinder head. Because valve clearances are factory-adjusted and are designed to remain within tolerance for several thousand hours, close machining tolerances are essential.
Although the company faced a tall order, it was able to achieve faster turnaround times while improving accuracy. Mercury succeeded by implementing an automatic, three-axis CNC vertical tool presetter and measuring machine.
“With the help of our Venturion system from Zoller Inc. (Ann Arbor, Michigan), we were able to improve tool accuracy from ±0.0002 inch to ±2 microns,” says Dale Kutchek, group leader/preset.
The company says that it previously spent a considerable amount of time setting the tool. “Setting each tool required between half an hour to 45 minutes because we had to calculate all of the settings manually,” Mr. Kutchek notes. “This has been reduced to 5 to 10 minutes. We’ve also gained the assurance of consistency.”
Three separate inserts are positioned in the tool. The way they flow into one another is crucial, as the cutter rotates in the cut and creates the valve seats in the heads for the new engine. The new system can measure the location of each insert on the tool and display the width of the intersection between the three inserts. Therefore, plant personnel know that they will be cutting to a certain depth and diameter on the valve seat. According to Mr. Kutchek, this has directly impacted the cutting accuracy of the machining centers.
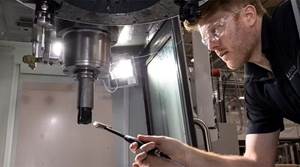
Another time-consuming task the company was able to streamline was checking the valve seat tools. This manual process produced less than reliable results. In the hopes of gaining better control, Mercury selected Zoller’s Saturn vision system for automatic measuring and inspection of each tool in the plant’s complement. The company began using the vision system in tandem with the Venturion.
The measuring machine features a Z-axis measuring range of 23.58 inches (600 mm) and diameter of 15.72 inches (400 mm). Two CNC-driven linear slides—vertical and horizontal—position the optic carrier, while the CNC spindle rotation permits focusing on the tool.
“The image processing technology we employ permits fully automatic measurement of tool length, diameter, corner radius and two cutting edge angles,” explains Mr. Kutchek. “The software also detects cutting edges for virtually any shape, location and orientation in the measuring screen.
“A manual measuring mode for length, radius and angles helps determine the dimensions of chips and breaks on cutting edges,” he adds.
Included in the presetter is a high-precision spindle system with power-operated tool clamping for taper, HSK, KM and Capto style tooling adapters. According to Mr. Kutchek, using this system has enabled his group to quickly handle any tool in the plant. Adapters can be exchanged in less than 10 seconds with 1-micron change-over repeatability in length and diameter, as well as 2-micron concentricity.
Once the tool is located in the spindle, the CNC autofocus spindle then provides user-independent and fully automatic tool positioning. The manufacturer offers various focus modes to accommodate any style of cutting edge geometry.
Zoller software measures the cutting contour when rotating the cutting edge through the camera system. As Mercury has found, this capability is useful when measuring the cutting contour of milling cutters and form tools to ensure proper machining results prior to cutting one piece. The company postulates that the improvement in first-pass yield at the motor maker is directly related to this capability.
Mercury has also found the valve seat measuring program from Zoller to be particularly valuable in machining the heads for the new four-stroke outboard motors. The Verado supercharger force feeds the combustion chamber with a dense air-fuel mixture, causing high pressure in the cylinders.
In addition to the measuring software, Zoller Tool Management software provides the company with information regarding usage, storage and ordering. Mercury can also manage tool assemblies with graphic information, geometry data and specific machine control data and generate tool lists for production jobs.
More than 6,700 tools are in the tool department’s databases, with two to five back-up tools each. A total of 35,000 tools are accessible in-house. The department sets each one and returns it right back to the shop floor where it is needed. The tools are not stored in a tool crib.
“As we explore the capability of the Zoller system, we’ve also noticed improvements on other tools,” comments Mr. Kutchek. “There is more we will learn about what the system can do for us, so we anticipate even greater benefits to our operations. For example, an upcoming boring tool will be electronically set as we add functions to the presetter. Instead of manually adjusting this boring tool, we will work from an interactive display. This lets us relay the appropriate tool setting to the presetter.”
Related Content
High-Feed Machining Dominates Cutting Tool Event
At its New Product Rollout, Ingersoll showcased a number of options for high-feed machining, demonstrating the strategy’s growing footprint in the industry.
Read MoreHow to Troubleshoot Issues With Tool Life
Diagnosing when a tool is failing is important because it sets an expectation and a benchmark for improvements. Finding out why gives us a clue for how to fix it.
Read MoreHow to Mitigate Chatter to Boost Machining Rates
There are usually better solutions to chatter than just reducing the feed rate. Through vibration analysis, the chatter problem can be solved, enabling much higher metal removal rates, better quality and longer tool life.
Read MoreToolpath Improves Chip Management for Swiss-Type Lathes
This simple change to a Swiss-type turning machine’s toolpath can dramatically improve its ability to manage chips.
Read MoreRead Next
Building Out a Foundation for Student Machinists
Autodesk and Haas have teamed up to produce an introductory course for students that covers the basics of CAD, CAM and CNC while providing them with a portfolio part.
Read More5 Rules of Thumb for Buying CNC Machine Tools
Use these tips to carefully plan your machine tool purchases and to avoid regretting your decision later.
Read MoreRegistration Now Open for the Precision Machining Technology Show (PMTS) 2025
The precision machining industry’s premier event returns to Cleveland, OH, April 1-3.
Read More


.png;maxWidth=300;quality=90)


