Automated Honing Reduces Cycle Time by 75 Percent
Faced with increased demand for a critical aerospace part, this manufacturer sought to replace its manual honing machines with a CNC model. As a result, the company achieved a 300-percent increase in production, better ID surface finishes and dimensional tolerances, and the ability to produce a wider range of part sizes.
Share


.png;maxWidth=45)
DMG MORI - Cincinnati
Featured Content
View More

ECi Software Solutions, Inc.
Featured Content
View More
Takumi USA
Featured Content
View More
Knowing when to "hold ‘em" and when to "fold ‘em" takes on new meaning when referring to aircraft fuse pins. These critical components serve two, seemingly conflicting purposes: to securely mate the jet engine to the wing and to break away in emergency situations to prevent structural failure and fires. Considering their function, one could argue that the design and manufacture of these parts are nearly as important to air-travel safety as the integrity of the wing or the soundness of the engine.
With a significant portion of the pins used in today’s commercial and military aircraft coming from one supplier—Sonic Industries—it’s especially important for that supplier to get it right. However, achieving the delicate "hold-or-fold" balance needed to ensure the pins function effectively is no walk in the park. Sonic must strictly adhere to tight ID tolerance and surface finish requirements or risk part failure at the worst possible moment—a crash or other hard landing. The SV-1000 honing system from Sunnen (St. Louis, Missouri) has not only enabled the company to meet these performance-critical specifications more easily, but also increased productivity and expanded the range of part sizes it can produce.
Based in Torrance, California, Sonic Industries specializes in the production of high-strength, safety-related fasteners and precision round-bar components. Founded in 1964, the company is part of the Sargent Aerospace Group, a global aerospace and defense industry supplier.
Fuse pins, also known as shear pins, affix the jet engine to a pylon, a structural component that connects with the wing spar. If an excessive load is placed on the pylon or the engine itself—typically a result of a hard impact—the pins shear cleanly to allow the engine to separate safely from the wing. Otherwise, the engine could drag along the ground and cause fire or damage to the fuselage. Fuse pins serve a similar function on landing gear to prevent the gear from rupturing fuel tanks inside the wing box during a rough landing.
Previously, the fuse pins were designed with a notch to provide a weak point that would break on impact. However, a cylindrical pin with a notch is more vulnerable to excessive corrosion and fatigue damage, which could cause the pins to "fail" prematurely. That design feature has since been abandoned, and ID tolerance and finish are now the critical factors in fuse pin performance.
The ID surface finish requirements are especially demanding, as any irregularities could adversely impact the pins’ performance. Although the precise specifications are proprietary information, Roy Franks, Sonic’s facility manager, says they fall in the range of 8 to 16 RMS. Moreover, unlike the OD, which is machined to standard, repeatable dimensional tolerances, ID size must be within 5 to 7 microns (0.0002 to 0.0003 inch). ID geometry varies—some pins include through holes, while others feature blind holes with angles and radii or just bottom radii.
Sonic produces the pins from bars forged to specific geometry and constructed from steel and stainless steel alloys, including 318 and 15-5. These bars are gun-drilled, then bored to a rough, preliminary hole size. At that point, the parts are heat-treated in-house and tested to establish the shear value before moving to final machining and OD finish grinding. The heads are finish-machined with slots or hexes. The pins are then bored and honed to establish the required ID size, geometry and surface finish. After honing, the parts are measured with an air gage.
The honing operation was previously performed manually using Sunnen MBB 1805 and CV-616 machines. While sufficient to meet the required specifications, this became a bottleneck when customer demand increased. "We needed to increase productivity, and we decided automating the honing process was the best way to accomplish that," Mr. Franks says.
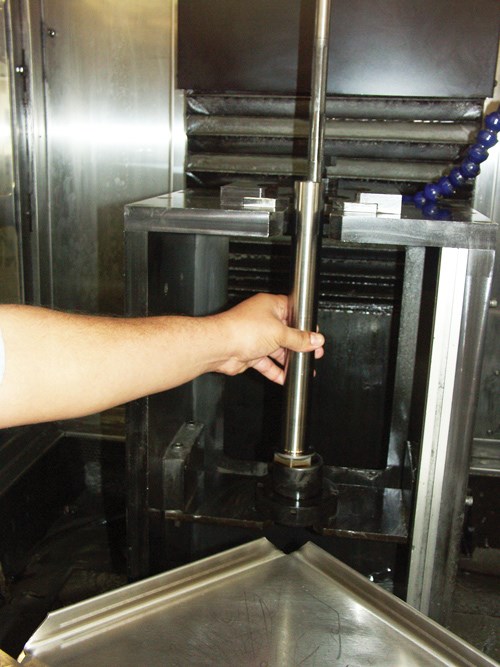
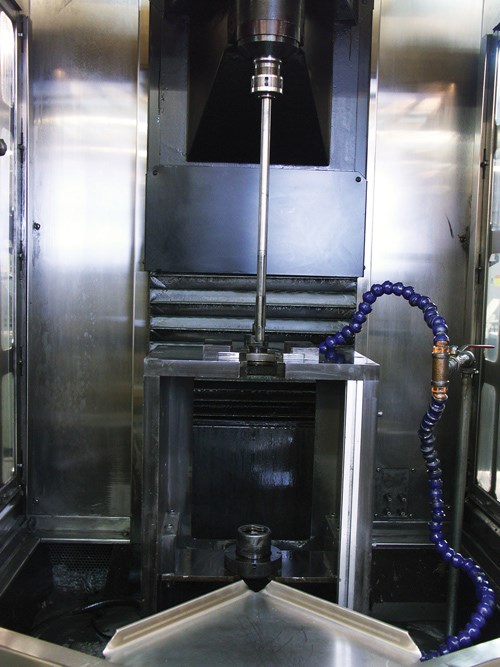
Time studies conducted with Sunnen indicated that the CNC-controlled SV-1000 would enable the company to achieve the production levels it needed. In fact, the machine exceeded those estimates, reducing cycle times from 40 minutes to 10 and increasing productivity from nine to 40 parts per day. Automating the process also freed operators to tend to more than one machine. "With the manual hones, our process was to hone a little, check the part, hone a little more and then check the part again," Mr. Franks explains. "With the CNC hone, we dial in the settings, and the part comes out to spec 99 percent of the time. That means the operator can have one eye on the honing machine and the other on another piece of equipment."
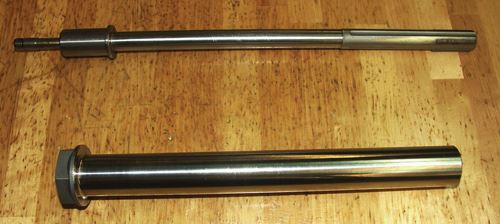
The machine’s consistency in meeting the part’s micron-level accuracy requirements is due in part to the use of Sunnen’s MMT superabrasive tools. Designed specifically to work with the SV-1000 series, MMT tools are custom-engineered to the application based on width, length and expansion angle. The number and placement of the abrasive particles can also be adjusted to cope with difficult features such as blind holes. As a result of this customization, the tools can provide accuracies ranging to 0.0006 mm
(0.000027 inch) for diameter, roundness, straightness and taper. Additionally, body and feed wedges constructed from hardened tool steel provide five times greater tool life than conventional designs, reducing per-part costs by as much as 30 percent, the manufacturer says.
Another advantage for Sonic is the machine’s longer stroke length, which enables machining a wider range of part sizes. Whereas the previous models had a stroke length of only 9 inches, the SV-1000 features a 31-inch stroke length and handles diameters ranging to 3 inches.
Productivity has increased by 300 percent since installing the machine, but Mr. Franks thinks that number can climb even higher. "We could bump up productivity even more by loading three parts in a rotary table and honing one while the others are being checked. We’re looking at purchasing another SV-1000, and we’ll consider getting the rotary table with that one."
Related Content
How to Meet Aerospace’s Material Challenges and More at IMTS
Succeeding in aerospace manufacturing requires high-performing processes paired with high-performance machine tools. IMTS can help you find both.
Read MoreSolar Atmospheres Receives Northrop Grumman Approval for South Carolina Facility
All five Solar Atmospheres facilities are now an option for customers with Northrop Grumman requirements for vacuum heat treating.
Read MoreSandvik Coromant Inserts Provide Stable Turning of Aerospace Components
The new insert grades GC1205 and GC1210 cover a large application area within last-stage machining and intermediate-stage machining when turning aerospace engine components.
Read MoreArch Cutting Tools Acquires Custom Carbide Cutter Inc.
The acquisition adds Custom Carbide Cutter’s experience with specialty carbide micro tools and high-performance burrs to Arch Cutting Tool’s portfolio.
Read MoreRead Next
Building Out a Foundation for Student Machinists
Autodesk and Haas have teamed up to produce an introductory course for students that covers the basics of CAD, CAM and CNC while providing them with a portfolio part.
Read More5 Rules of Thumb for Buying CNC Machine Tools
Use these tips to carefully plan your machine tool purchases and to avoid regretting your decision later.
Read MoreRegistration Now Open for the Precision Machining Technology Show (PMTS) 2025
The precision machining industry’s premier event returns to Cleveland, OH, April 1-3.
Read More


.jpg;maxWidth=300;quality=90)


