Aligning Critical Bores
A chuck/fixture combo enables a gage maker to drill perfectly aligned holes in dial indicator housings.
Share


Most people who use a dial indicator seldom give much thought to the "action" of the instrument, that is, the smoothness with which the spindle responds to dimensional changes in the part being measured. But experts such as Bruce Peterson, president of Chicago Dial Indicator Co., Inc. (Des Plaines, Illinois), who know measuring instruments inside and out, know that that smoothness of action is a measure of the quality of the tool.
"The spindle passes through holes in the top and bottom of the dial indicator housing," Mr. Peterson explains. "The smoother the spindle rides in the dial indicator, the less force it takes to operate the gage. The less force you put on the parts you are measuring, the more consistent your measurements and the better the repeatability of the indicator. For the spindle to slide easily through those holes, they must be in near-perfect alignment. Any misalignment affects the movement of the spindle and the performance of the instrument."
CDI has been making mechanical dial indicators for nearly 70 years. Over that time, the firm has methodically selected those designs, materials and manufacturing techniques that it feels produce the best dial indicator. For example, CDI's dial indicator housings are brass forgings. "We like the solid feel of the forged housing for our mechanical dial indicators," Mr. Peterson explains. "It's one of the features that sets our gages apart from the competition."
Similarly, CDI determined long ago that the best way to drill those all-important spindle holes in the housing was on a lathe. The housing is a shallow cup with two stems spaced 180 degrees apart on the OD. Each stem is drilled separately and, for the reasons cited above, the holes must align perfectly.
Why not simply drill both stems in the same operation? "It doesn't work," Mr. Peterson explains. "After the drill drills through the first stem, it must reach 2 inches across the inside of the housing-completely unsupported except for the entry bore. When the drill reaches the opposite side of the housing, it must penetrate the curved surface at precisely the right spot. Invariably, the tool tip wanders and the opposing stem is improperly drilled."
To ensure the alignment of the two holes, CDI had a pneumatic chuck custom made with an integral fixture that would permit drilling a hole in the first stem and then rotating the housing 180 degrees to drill the opposite stem. The chuck was designed for mounting on the shop's CNC lathe.
The chuck served CDI well over the years: it machined hundreds of thousands of dial indicator housings. Time and usage took their toll, however, and tolerances of plus or minus 0.001 inch became difficult to hold.
There were other problems as well. The chuck-and-fixture arrangement is massive-it weighs about 50 pounds-and can only be run at about 2,000 rpm, which limits machining speeds. Tool indexing times on the CNC lathe's tool turret were also slow, adding to the cycle time. Probably the most important drawback was that drilling of the housings depended entirely on the one lathe with its custom chuck: CDI had no way of increasing its machining capacity to accommodate busy periods, and if the lathe or the custom chuck broke down, drilling of the spindle bores in the housings would stop, and assembly would grind to a halt.
Assembly Headache
Machining inaccuracies caused by the worn chuck created problems for CDI's assembly department as well. Some 30 to 35 components make up a mechanical dial indicator, and their assembly resembles a watch-making operation. At CDI, the dial indicators are completely assembled by hand. The older hands know how to "tweak" the assemblies to compensate for machining inaccuracies in the housings, but doing so takes time and calls for a certain amount of craftsmanship.
"Our assembly people are great workers, but they are not old-world watchmakers who consider fit problems a personal challenge, nor are they interested in solving someone else's problems," notes Cliff Anderson, chief engineer for CDI. "Having to put in the extra time needed to get around fit problems cuts into their productivity and makes them look bad.
"At CDI we have a tradition of continuous improvement, and one of our current goals is to simplify our assembly operation," Mr. Anderson continues. "That means making our dial indicator parts so consistent that assembly becomes foolproof and tweaking becomes unnecessary. And let's not overlook the obvious: the faster and easier our dial indicators go together, the more we can ship at the end of the day."
To get around the problem of inaccurately machined spindle bores in the indicator housings, and to defuse the constant threat of stoppages should something happen to the lathe fitted with the custom chuck, CDI considered installing another custom chuck on one of the firm's other CNC lathes. However, all of CDI's other CNC lathes are Hardinge Conquest GTs, which are smaller than the older CNC lathe and unable to accommodate so large a chuck. "Everything we do involves relatively small parts," Mr. Anderson explains. "Accordingly, most of our machine tools are geared to small parts. It would have been hard to justify the purchase of another lathe just to accommodate a custom chuck."
A Different Approach
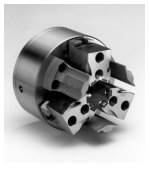
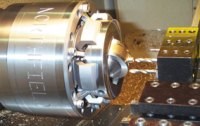
Still looking for a solution to the problem, CDI decided to tap the expertise of one of its vendors, Northfield Precision Instrument Corp. (Island Park, New York). Northfield chief engineer Paul DeFeo studied CDI's problem and came up with a solution: instead of a custom chuck with an integral fixture, he suggested using a standard Northfield diaphragm chuck in combination with separate, interchangeable fixtures for the housing. CDI recognized a number of advantages to Mr. DeFeo's solution and ordered a chuck and a pair of identical fixtures for its Group 2 mechanical dial indicator, the firm's most popular size.
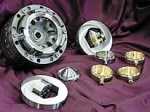
Mr. DeFeo's solution consists of a standard Northfield diaphragm chuck and a fixture designed to hold the dial indicator housing for machining of the opposed stems. The fixture is a 1/2-inch-thick steel disc with an opening in its center. A steel cylinder with four locating pins inserts in the opening of the disc and is secured with a bolt.
A dial indicator housing is placed atop the steel cylinder, open side down. Four holes, drilled in the bottom of the dial indicator housing in a previous operation, match the steel cylinder's locating pins and orient the housing so that the two stems of the housing are perpendicular to the face of the fixture. A cone-shaped steel cap sits on the bottom of the dial indicator housing, and the screw is tightened to clamp the assembly.
The faces of the fixture and the mating surface of the diaphragm chuck are ground flat to within 0.0001 inch. When the fixture is secured in the chuck, the first stem is perpendicular to the chuck and completely accessible to the lathe's gang tooling. In short order a 0.150-inch-diameter (+0.0005/-0.0000) through-hole is drilled in the stem, and its OD is turned and threaded.
The machining program stops, at which time the operator removes the fixture from the chuck, turns it around to present the opposing stem to the tooling, and replaces it in the chuck. The operator hits the start button, and machining begins on the second stem (drilling, OD turning and threading).
While the lathe is machining a dial indicator housing, the operator unloads a previously machined housing from an identical fixture and loads the next housing to be machined. The fixtures can be interchanged on the Northfield chuck in about 15 seconds, as opposed to 25 seconds to load a housing in the custom chuck, dramatically reducing lathe idle time.
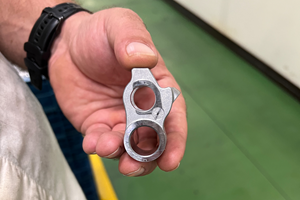
Most important, the holes in the opposing stems of the dial indicator housing are in perfect alignment. Mr. Anderson hands visitors to CDI a housing machined using the old chuck, another machined on the Northfield chuck/fixture combination, and a gauge pin. When the gauge pin is inserted through the first bore of the "old" housing, it travels across the opening but stops at the mouth of the opposing bore-indicating a misalignment. On the "new" housing, the gauge pin passes through both bores with just a trace of resistance, indicating a precise alignment.
"The keys to the success of this application are the flatness and parallelism of the fixture faces and chuck mating surface and the use of one of our diaphragm chucks," explains Mr. DeFeo. "In the first place, all matching surfaces are ground flat to ensure that when the fixture is clamped in the chuck, the housing's stems will be normal to the chuck face and perfectly in line. "A diaphragm chuck is not inherently more accurate than, say, one of Northfield's sliding jaw chucks," Mr. DeFeo continues. "However, a sliding jaw chuck has a tendency to lift the workpiece (or fixture) away from the chuck face as it grips the workpiece. By contrast, a diaphragm chuck pulls inward, keeping the workpiece-in this case the face of the fixture-flush with the chuck. The diaphragm chuck is not only lighter and more compact than the custom chuck formerly used, but it is also designed for speeds up to 10,000 rpm, which allows CDI to operate the lathe at higher speeds for better productivity."
Measuring The Advantage
"We have just begun using the Northfield chuck to machine our dial indicator housings, so we have not had time to assess its total impact on production," CDI's Mr. Anderson cautions. "For starters, however, we have been able to drill the housing bores to much tighter tolerances: from +0.001 inch by the old method, to +0.0005/-0.0000 inch with the Northfield chuck.
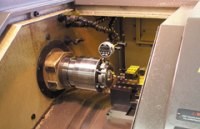
"We're not only machining the housing stems to tighter tolerances, but we're machining them faster as well," Mr. Anderson continues. "We estimate that we have reduced machining time for the operation by 30 percent because of several factors. First, the combination of the Northfield chuck and fixture is lighter and more compact than the custom chuck we used previously. As a result, we can operate the Hardinge GT lathe on which it is mounted at speeds to 5,000 rpm, instead of the 2,000 rpm we were limited to previously, resulting in faster machining cycles.
"Secondly, it takes our operator less time to change fixtures on the Northfield chuck (about 15 seconds) than it did to load or reposition the housing in the custom chuck under the old arrangement (about 25 seconds)," Mr. Anderson continues. "Also, because our newer CNC lathes are equipped with gang tooling, going from one tool to another takes less time than it did on the older CNC lathe with its tool turret.
"We are in a period of transition, going from total dependence on the custom chuck mounted on the older lathe, to a situation where we're beginning to shift machining of the housings to one of our newer Hardinge Conquest GT lathes equipped with the Northfield chuck," Mr. Anderson continues. "There's a sense of relief at no longer having to depend exclusively on an aging machine and accessory to keep our assembly lines going."
"Probably the most important contribution that the combination of the Northfield diaphragm chuck and the custom fixture makes is the greater consistency of the machined housings," adds Mr. Peterson. "We put a lot of effort into finding and eliminating as many process variables as possible. Our goal is to make the product as consistent as possible to keep the quality of our dial indicators as high as possible.
"The housing is the foundation of our dial indicators," Mr. Peterson continues. "Everything assembles to it, so we want to start with the most accurate foundation possible. That in turn simplifies assembly operations. Instead of having to compensate for dimensional variations in the cases, as was sometimes the case before, our assemblers can concentrate on ways to make assembly of our dial indicators more consistent from unit to unit. Because our dial indicator assembly operation is manually intensive, there will always be minor variations from one instrument to the next. But ongoing improvements to the process, such as the new workholding method using the Northfield chuck, help us to minimize and control those variations."
BCDI has ordered another custom fixture for its Group 1 dial indicators. Eventually the firm will have purchased a custom fixture from Northfield for each of its remaining dial indicator sizes. That will enable the firm to machine housings of different sizes on the same lathe simply by loading the appropriate fixture and corresponding machining program. Also, the firm will be able to machine different housing sizes simultaneously on one or more of its other Hardinge GT lathes.
CDI expects that the increased flexibility provided by the improved housing-machining capability will result in "improved production scheduling and faster delivery times for customers. "The improvements made in drilling of the housings and assembly of the dial indicators is going to increase our production capacity, but we have our sales people working on that problem right now," Mr. Peterson reports.
Related Content
Custom PCD Tools Extend Shop’s Tool Life Upward of Ten Times
Adopting PCD tooling has extended FT Precision’s tool life from days to months — and the test drill is still going strong.
Read MoreEmuge-Franken's New Drill Geometry Optimizes Chipbreaking
PunchDrill features patent-pending geometry with a chipbreaker that produces short chips to control machining forces.
Read MoreMikron Tool's Drill Provides High Performance in Titanium
The new CrazyDrill Cool Titanium series is designed to provide controlled chip removal, high drilling speeds and long tool life.
Read MoreKennametal's Expanded Tooling Portfolio Improves Performance
The company has launch eight new products that expand on and support existing platforms across multiple applications.
Read MoreRead Next
Chucks For Specialty Applications
Sometimes the standard three-jaw chuck isn't the best workholder for a job. Here are some alternative designs and some advice on where to use them.
Read MoreBuilding Out a Foundation for Student Machinists
Autodesk and Haas have teamed up to produce an introductory course for students that covers the basics of CAD, CAM and CNC while providing them with a portfolio part.
Read MoreSetting Up the Building Blocks for a Digital Factory
Woodward Inc. spent over a year developing an API to connect machines to its digital factory. Caron Engineering’s MiConnect has cut most of this process while also granting the shop greater access to machine information.
Read More




.png;maxWidth=300;quality=90)


