The Value Of Conserving Measuring Range
Many people confuse the act of measuring a part with that of gaging a part. Although both operations are similar, understanding the subtle differences between the two can improve the accuracy and efficiency of both processes.
Share


Autodesk, Inc.
Featured Content
View MoreMany people confuse the act of measuring a part with that of gaging a part. Although both operations are similar, understanding the subtle differences between the two can improve the accuracy and efficiency of both processes.
Measuring is the process of determining the dimensions of a part by referring to a standard. Precision tools, such as scales, calipers and micrometers, are measuring instruments. They have a built-in dimensional reference such as precision etched lines, a magnetic scale, or a precision screw. These provide the standard against which the part is compared. Long-range digital indicators on a bench stand can also be thought of as measuring instruments, because the bench’s anvil acts as the reference.
Because measuring instruments have long measuring ranges (typically between 25 mm and 150 mm), they are versatile and are often used in general inspection job shop areas.
Gaging is the comparative process of determining whether a part is smaller or larger than a predetermined standard (or master part). Gages do not have a built-in reference standard. Rather, the standard or master is brought to the gage and the gage is set to that size.
Gages are often built to measure one part. Thus, gages tend to be used in high production areas and are often more accurate than measuring tools. Because their application is so specific, they are not as versatile as measuring instruments, nor do they need as much measuring range—often less than 5 mm is sufficient. As a result, very high resolution displays can be used with gages.
The rule of thumb is that measuring tools tend to have long ranges and high versatility, while gages or comparators tend to have short ranges and less versatility, but high accuracy. Let’s see how this applies to comparators versus indicators.
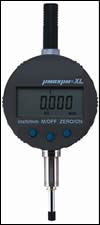
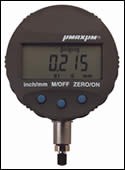
Dial and digital comparators have limited range but often have very high resolution and accuracy. Most have ranges considerably less than 5 mm. Some dial comparators are so limited in range that reading them is virtually foolproof because they allow only a single revolution of measuring range. Dial and digital comparators also tend to be less expensive and easier to operate (once mastered) than dial and digital indicators.
Dial and digital indicators, on the other hand, have much longer range—usually greater than 12 mm and occasionally as long as 50 mm—which makes them measuring instruments under our definition. However, it’s not uncommon to see dial and digital indicators set up to act as comparative gages. A typical example is a long-range digital indicator set up on a height stand. If the indicator is “zeroed” on the base of the stand, it will provide very accurate, dimensional measurements throughout its length of travel. However, if the same setup is used for comparative gaging—that is, by zeroing it to a master—you are actually “wasting” the digital indicator’s extra range. You are paying for capability you don’t need.
By the same token, a dial or digital comparator is a better choice for something like a mechanical comparative snap gage, which has relatively short mechanical measuring range. The comparator has a measuring range similar to the comparative height stand gage and thus provides better performance and economy.
In a world where conservation is key, we should not waste measuring range. Installing a 25-mm digital indicator on a gage that only needs 5 mm of gaging range is wasteful. Those extra 20 mm of measuring range should be put to use in some other application where they would be more fully utilized.
Read Next
5 Rules of Thumb for Buying CNC Machine Tools
Use these tips to carefully plan your machine tool purchases and to avoid regretting your decision later.
Read MoreRegistration Now Open for the Precision Machining Technology Show (PMTS) 2025
The precision machining industry’s premier event returns to Cleveland, OH, April 1-3.
Read MoreBuilding Out a Foundation for Student Machinists
Autodesk and Haas have teamed up to produce an introductory course for students that covers the basics of CAD, CAM and CNC while providing them with a portfolio part.
Read More


.png;maxWidth=150)


