Four Toolholder Quality Factors
Toolholders are a critical link between the machine tool and the workpiece. This article looks at four fundamental toolholder manufacturing parameters that precision metalcutting shops need to consider when tooling for a job.
Share


.png;maxWidth=45)
DMG MORI - Cincinnati
Featured Content
View More

ECi Software Solutions, Inc.
Featured Content
View MoreCNC machining centers have been constantly improving over the past three decades. These machines are now so flexible in design that with minimal reconfiguration they can be applied to anything from very short-run tool making to long-run manufacturing. Aircraft components that were once weldments or riveted assemblies are now being carved from solid aluminum on high speed, high-horsepower machining centers. Automobile engine production, once almost exclusively the province of dedicated transfer lines, is moving toward the more agile concepts offered by machining centers. An essential characteristic of these machining centers is their ability to change tools automatically without any operator interaction.
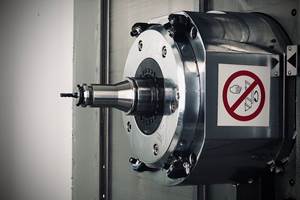
The toolholder provides the standard connection between various cutting tools and the machining center spindle. It works in much the same way that an adjustable drill chuck allows the home handyman to change bits in a portable drill motor. The socket in a machining center spindle and the shank and flange areas of a toolholder are made to standards that have been developed around the world over the last 25 years. For the most part, these standards are well thought out, and, if both the spindle and holder are in conformance to standard, a solid and concentric connection between the spindle and toolholder will be the result.
Because of their standard configuration, and because of the slow rate of innovation of tool holding systems relative to the machines that they serve, the lingering perception among some machining center users is that toolholders tend to be "commodity items." Given the number of apparently successful toolholder manufacturers competing in the marketplace today, the commodity conclusion is an easy one to draw. But some end users do not accept the commodity theory. While it's true that all toolholders of a specific type may look alike, definitely not all are created equal.
Differences In Toolholder Quality
What makes any one thing better than another? In most metalworking applications, the difference between a good part and scrap is often a tiny fraction of an inch on a critical dimension. Likewise differentiating a high precision toolholder is a matter of adherence to manufacturing tolerances.
Concentricity—First Criterion
The meaning of the first statement is clear. The cutting tool must rotate exactly on the rotational axis of the machine tool spindle. The means of accomplishing this near-perfect concentricity are also clear, but complex.
To begin, the toolholder's tapered shank must sit within the corresponding spindle taper very precisely each and every time it is inserted. For this to happen, the mating surfaces must be matched to very tight cone angle tolerances. These tolerances are specified and published by national and international standards committees and are generally available for review by anyone. Well-made toolholders are measured for roundness and taper angle in gages that are calibrated by hard master gages. The methods involved in using production gaging vary from hard contact mechanical, hard contact/electronic analog to non-contact analog techniques (such as air gages). All can be effective. The common denominator of these methods is the hard master gage used for calibration.
There is a definite variation between the master gages of the various toolholder manufacturers. This strong assertion is based on the measurement of hundreds, if not thousands, of toolholders made by many different manufacturers over many years. Simply put, they vary. If it is assumed that all toolholders in the marketplace conform to their corresponding manufacturer's gages, then it follows that the master gages used by the various manufacturers are not the same. The problem is that this situation results in variations of spindle fit from manufacturer to manufacturer. The reason is easily understood. There is no "Grandmaster" gage for standard tapers. The National Institute of Standards and Technology (NIST), Gaithersburg, Maryland, and highly capable metrology laboratories such as that found at Timken Corporation, Canton, Ohio, can measure tapers with adequate precision on rotary tables under certain circumstances. But there is no single reference hard gage that can readily authenticate other hard gages of the same size and taper rate. Without a single source or master gage from which to trace all gages, it is understandable that there are variations in conformance to standard dimensions from part to part across the marketplace and that these variations can affect the quality of spindle fit. Let's go a little deeper into this.
Remember that we are still dealing with the issue of keeping the tool on the center line of the spindle. Even if the spindle fit confusion issue were resolved any time soon, the problem moves forward to the business end of the toolholder. At this point, the end user has even more reason to lose confidence because now there is no national or international standard for reference. Spindle and toolholder taper fit and tool changing function have been specified by standards organizations such as ISO, ANSI, JIS or DIN, but at the other end, where the cutter fits the toolholder, the toolholder manufacturers are on their own. They alone set tolerances for inside diameters of end mill holders, cone angles on collet chucks, and face squareness on shell mill adapters. They alone set the tolerance of the concentricity of these holding features relative to the tapered shank that enjoins the machine spindle. Only the toolholder manufacturers can fixture their machines so that the mating surfaces are machined with the tapered shank, with spindle interface as the surface of registry.
Before the discussion of concentricity is ended, there is another, more general, variable to be considered. That variable is the innate capability of the manufacturer to make not only good, but consistently good, products. Within any industry, there are variations between manufacturers in the ability to make high quality products day in and day out. In your own business circles, you can name good and not so good competitors and suppliers. Usually there is a paragon company in every market and the good manufacturers are striving for that status.
Therefore, on the first and most crucial attribute of a good toolholder, concentricity, there is good reason to believe that there are likely variations in toolholder quality from manufacturer to manufacturer in terms of gaging, product standards, tolerances and manufacturing capability.
Holding Strength—Second Criterion
Here is where the "commodity theory" believers score some big points. In case nobody has noticed, most toolholders made to a given standard look very much alike. Be they CAT, BT or HSK, they are made up as side lock end mill holders that use a setscrew against the flat on the tool to prevent the tool from coming loose. They may be made to accept standard collets that allow the holder to be more adaptable to a variety of tool diameters. They may be specialized to hold threading tools or Morse taper drills. And, there are many others. The fact is that virtually every manufacturer of CNC toolholders offers a solution to facilitate the use of most cutting tools in most machine spindles.
The principal source of variability in holding force, the ability to keep the cutting tool from spinning in the holder, occurs when collets are employed. Single angle collets, such the ER and TG series are usually preferred. Single angle collets exert more holding power and tend to offer superior concentricity. But collets, just like toolholders, are subject to considerable variability from manufacturer to manufacturer. To obtain the best possible concentricity from a toolholder, collet, and cutting tool assembly, a means of measuring concentricity, either with a specialized gage or a high quality tool presetter, is essential. When the best combination of holding power and concentricity is the goal, either hydraulic or heat-shrink toolholders should be employed to eliminate the collet entirely.
Some manufacturers do indeed offer heavy duty versions of collet chucks and end mill holders for extreme applications. But with the possible exception of hydraulic and heat-shrink technology, most makers have done an effective job of copying each other's product lines so that there is an incredible sameness of appearance of toolholders in the marketplace. The differences are in proper execution, which brings us back to the conclusions reached above—there are differences in gaging, internal standards, tolerances and, most of all, manufacturing capability. Simply put, toolholders are not all the same.
An Illustration Regarding Gaging—Third Criterion
Here's a case in point that illustrates gaging variability. Six years ago when our company began producing holders to the emerging HSK standard, the first step was to purchase the required gages. As access was obtained, a rather broad variety of HSK products produced by competing manufacturers (in those days, mostly European) was measured relative to the master gages we obtained from Germany. The results were appalling. None of the parts measured were within tolerance. With what can only be described as a healthy case of paranoia, a new master gage was purchased from a different German gage maker. Amazingly, both gages agreed exactly. The difference was in manufacturing. While making holders in conformance to the HSK standard is certainly no walk in the park, a better result should surely have been the case.
Every manufactured item has tolerances which are basically the measure of manufacturing variability—less variability, higher tolerances. Therefore, the above anecdote does not deny that all of the holders looked at were functional on some level or in some spindles. But the toolholder manufacturer has no way of controlling the end use of a toolholder. It is not within the province of a toolholder manufacturer to deviate materially from a standard if the product is offered for sale under that standard.
Balance—Fourth Criterion
More and more of the machining centers sold today come equipped with spindles designed to run at maximum spindle speeds of 10,000 rpm or higher. Not only must the tools for these machines be concentric and strong, but they must be balanced as finely as the spindles in which they are installed. If they are not, the result will be unwanted vibrations that create chatter and will ultimately diminish surface finish and cutting tool life. In extreme cases, when imbalances are large, spindle damage can result. Much has been written about the physics of toolholder balance in recent years and need not be repeated here. An important point, however, is that the force generated by an unbalanced condition within a tool/toolholder assembly is proportional to the square of the spindle speed. Negligible forces generated at 1,000 rpm are one hundred times greater at 10,000 rpm and four hundred times greater at 20,000 rpm. The need for excellent concentricity is also more important at elevated spindle speeds because if the tool is not rotating on the spindle center line, it becomes a prime source of additional imbalance.
Sources of imbalance in toolholders are often functional, such as locking screws in end mill holders or unequal depth drive slots in CAT holders. Often, however, they are random due to any number of reasons. In any case, it is required that material be removed to offset the imbalance to effect correction. Other solutions to the balance problem entail the use of balanceable holders that allow the end user to offset toolholder imbalances by manipulation of radially located setscrews or balancing rings. In these cases, correcting imbalances in toolholders requires that the imbalance be located and quantified which, in turn, requires the use of a sophisticated balancer. In some cases a shop is better off using pre-balanced toolholders obtained from a reliable source and used in combination with high quality cutting tools as a cost effective alternative to the purchase and operation of a balancing machine.
Don't Overlook Toolholders
There are a number of examples where improvements in spindle fit, concentricity and balance have facilitated difficult machining operations. At Gem Tool, a Minneapolis mold maker, a simple change in collet systems from a double-angle design to a single-angle DR20 series improved concentricity and repeatability on tool changes, increasing tool life and accuracy.
At Boeing (Everett, Washington), a bank of 30,000 rpm routers was successfully tooled for the machining of composite panels. For these collet chucks, special nosepieces were designed to further enhance balance and concentricity because the tools were very small and had almost no tolerance for imbalance.
At another Minnesota manufacturer, a single point boring operation produced several hundred thousand holes with a single diamond insert. The tolerance on the hole was three ten thousandths (0.0003) inch. Precision of the spindle fit was of absolute importance to accomplish this feat over that many automatic tool changes.
Some of these examples are extreme and some, like the collet series switch, are not. The point is this: In the extreme cases, production would not have been possible were it not for precise spindle fit and concentricity coupled with balance. While these concepts virtually enable extreme applications, the benefits that they generate carry over into everyday shop operation. Exact spindle fit results in part-to-part repeatability and makes the holding of tolerances over a production run easier, and thus less costly to achieve. Concentricity balances the chip load per tooth on cutting tools and makes them last longer. This reduces tool cost and down time. Balance assures that the full capability of the machine tool can be used to make chips and in doing so efficiently, reduce cycle time.
Precision manufacturers looking to reduce process variability should consider an incremental cost differential for a quality toolholder. A better toolholder can reduce cutting tool expenditures and machine downtime while increasing hourly production.
About the author: Dan Chartier is a consulting engineer for Command Tooling Systems, Ramsey, Minnesota.
Related Content
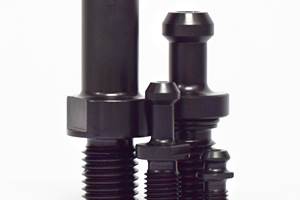
T.J. Davies Retention Knobs Maximize Cutting Tool Life
Custom-made retention knobs are sized to fit the machine tool and spindle or toolholder to extend the life of existing machine tool assets.
Read MoreFive Common Mistakes Shops Make with ER Collets (And How to Prevent Them)
Collets play a crucial role in the machining process, so proper tool assembly and maintenance is important. Here are five potential pitfalls to avoid when using ER collets.
Read MoreJergens Pull Studs Enable Quick Changeovers
SP140 and K02 pull studs offer quick-change solutions for vise or gripper jaws, electronic component manufacturing, packaging machines, medical technology and automation.
Read MoreHow to Troubleshoot Issues With Tool Life
Diagnosing when a tool is failing is important because it sets an expectation and a benchmark for improvements. Finding out why gives us a clue for how to fix it.
Read MoreRead Next
Registration Now Open for the Precision Machining Technology Show (PMTS) 2025
The precision machining industry’s premier event returns to Cleveland, OH, April 1-3.
Read MoreSetting Up the Building Blocks for a Digital Factory
Woodward Inc. spent over a year developing an API to connect machines to its digital factory. Caron Engineering’s MiConnect has cut most of this process while also granting the shop greater access to machine information.
Read MoreBuilding Out a Foundation for Student Machinists
Autodesk and Haas have teamed up to produce an introductory course for students that covers the basics of CAD, CAM and CNC while providing them with a portfolio part.
Read More


.png;maxWidth=150)





.png;maxWidth=300;quality=90)
