Big Inspection With Little Difficulty
A portable laser tracker let this shop increase not only its machining range, but also the range of its services to customers.
If Galaxy Tool could machine bigger parts, then that would let this Winfield, Kansas, shop do more than just take on a broader range of machining work. Machining the larger parts would let the shop go from making some of the components of aircraft-related tooling to making all of the machined components for some of these tools. Serving as a one-stop resource for machining in this way would make the shop a logical choice for assembling those components as well. Thus, when Galaxy recently bought its biggest machining center, the shop did more than just expand its envelope—it also expanded its range of services.
However, making this change took more than a new machine. As plant manager Gary Samms says, “Anyone can buy a big machine tool and cut big parts.” The challenge was assuring the quality of those parts. That is, the challenge was how to inspect them. The shop’s work includes bond tools and stretch dies for aircraft skins—tools with large, fluid surfaces that are not only geometrically complex, but also significantly larger than the shop’s biggest CMM.
The solution Galaxy found was a laser tracker, a portable device that can make precise 3D measurements at a distance by tracking a retroreflector as it is moved across the part. The tracker Galaxy chose came from Automated Precision Inc. (API) of Rockville, Maryland. In the way that it plays a role not only in precision machining but also in precision assembly, the tracker has been instrumental in letting the shop command much more aerospace business. Aircraft-related work now accounts for 75 percent of the shop’s activity—a noteworthy development for a company that was originally founded as a mold shop.
Growth Opportunity
In fact, that remaining 25 percent of business at Galaxy still represents a considerable amount of mold making. The shop’s specialties include both injection molds and blow molds. About eight years ago, however, the shop began to fill the open capacity on its machines with aircraft-related work, at first just serving the needs of aircraft makers in the area of nearby Wichita. The components of stretch dies and bonding fixtures resemble mold work in that the finished tools are unique assemblies featuring various critical, contoured surfaces. Soon the aircraft work was blossoming while the mold work was in decline. To pursue more of the aircraft-related opportunities, the shop ventured first into five-axis machining and then into increasingly larger work zones. Today, the newest and largest machining center in the shop is an SNK double-column, five-axis machine tool with 167 inches of X-axis travel and a table capacity of 33,000 pounds.
By contrast, the device that inspects work off of this machine is portable and lightweight.
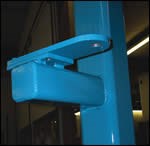
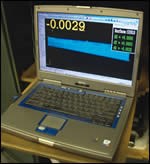
The laser tracker’s laser unit stands on a tripod. It pivots vertically and side-to-side to follow the position of a small retroreflector that can be moved by hand. API’s system is able to measure XYZ coordinate locations to an accuracy of ±0.0006 inch from 16 feet away and ±0.0012 inch from 65 feet away. Across these distances, the tracker system compensates for both the effect of humidity on the beam and the effect of ambient temperature changes on the dimensions of the part. A laptop connected to the tracker compares measured points to the part’s CAD model using measurement software chosen by the shop. In Galaxy’s case, this software comes from Verisurf of Anaheim, California.
Quality-control inspector Mike Anderson is the Galaxy employee who uses the tracker. He says setting it up takes less than an hour. It can be used wherever the part is located in the shop, on or off the machine tool. To begin inspection—to let the tracker “find” the part—he first measures a set of location reference points on the part. Using these points, the software applies best-fit analysis to locate the part in space with respect to the tracker.
“It wouldn’t matter if the part is turned upside down and suspended in the air,” Mr. Anderson notes. Because neither the part nor the tracker have to locate with respect to a flat surface, the tracker is good for inspecting not only very large parts, but also parts so irregular that they can’t lay flat on a CMM.
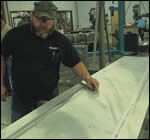
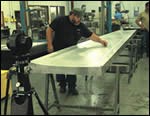
In fact, irregular features are about as easy to inspect as the regular ones. On Galaxy’s large parts, Mr. Anderson uses the tracker not only to measure specific points such as hole positions but also to “map” surfaces that are contoured. He does this simply by walking the length of the part while moving the retroreflector back and forth across the surface. This lets the tracker rapidly capture hundreds or thousands of points to precisely define the contours of the surface.
Measurement In Motion
Mr. Anderson says the portability of the tracker saves considerable expense. For example, the freedom to inspect parts on the machine tool when necessary—including, in many cases, parts that are small enough for the CMM—can save the time and effort of unloading the part for off-line inspection and potentially setting up the part again for additional machining. On some of Galaxy’s parts, the freedom to inspect the part without having to touch the setup can easily save the equivalent of a full day apiece for two employees.
The tracker can even travel to customers’ sites. “I take it on airplanes easily,” Mr. Anderson says. When a jig that Galaxy has produced needs to be repaired, setting up the tracker on the customer’s shop floor can often allow the repair to be done right there without having to transport the part.
Precision Assembly
Jigs used in aircraft assembly represent another example of the kinds of aircraft-related tooling that Galaxy now provides. While these jigs may not require complex contours, they generally have widely separated surfaces that have to precisely locate relative to one another.
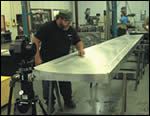
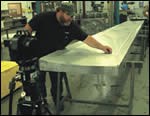
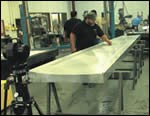
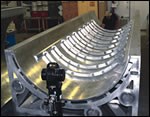
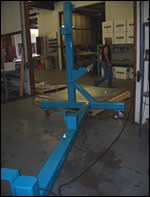
The photo on the facing page provides an example. This jig for a wing center section is a seemingly simple structure that is difficult to assemble because critical surfaces are so far apart.
Mr. Anderson says the tracker simplifies the job. The pad shown was clamped lightly, then monitored with the tracker while the piece was tapped into place with a hammer. Watching the tracker made it clear precisely when to stop tapping, at which point the pad was welded and the clamp was removed. Finding new uses such as this for the laser tracker—uses that go beyond big-part machining—reveals to the shop how advantageous it can be to have precise 3D measurement available anywhere the shop wants to use it.
Related Content
Help Operators Understand Sizing Adjustments
Even when CNCs are equipped with automatic post-process gaging systems, there are always a few important adjustments that must be done manually. Don’t take operators understanding these adjustments for granted.
Read More6 Machine Shop Essentials to Stay Competitive
If you want to streamline production and be competitive in the industry, you will need far more than a standard three-axis CNC mill or two-axis CNC lathe and a few measuring tools.
Read MoreParts and Programs: Setup for Success
Tips for program and work setups that can simplify adjustments and troubleshooting.
Read MoreTurning Fixed-Body Plug Gages Inside Out
Fixed-body mechanical plug gages provide fast, high-performance measurement for tight-tolerance holes.
Read MoreRead Next
IMTS 2024: Trends & Takeaways From the Modern Machine Shop Editorial Team
The Modern Machine Shop editorial team highlights their takeaways from IMTS 2024 in a video recap.
Read MoreIncreasing Productivity with Digitalization and AI
Job shops are implementing automation and digitalization into workflows to eliminate set up time and increase repeatability in production.
Read MoreInside Machineosaurus: Unique Job Shop with Dinosaur-Named CNC Machines, Four-Day Workweek & High-Precision Machining
Take a tour of Machineosaurus, a Massachusetts machine shop where every CNC machine is named after a dinosaur!
Read More




.jpg;maxWidth=300;quality=90)


.jpg;maxWidth=300;quality=90)


