5 Ways Automated On-Machine Probing Improves Productivity
Sponsored ContentUsing automated inspection tools in CNC machining provides numerous benefits that improve productivity and reduce scrap.
Share
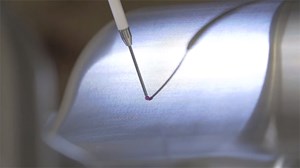
The key to precision manufacturing is right there in the name: precision. Accurate measurement is crucial to reproducibility, and reproducibility is the soul of modern manufacturing. Because of this, the evolution of machine tools has coincided with the development of more and better measuring techniques. These range both in size and complexity from the humble micrometer to the full-scanning coordinate measuring machine (CMM). Following this trend of co-development, on-machine probing has become more prevalent as machine tools have become more automated.
In-process metrology is both a product of automation and a necessary step towards further automation. It enables a shop to measure at any point in the manufacturing process, providing numerous opportunities to address out-of-spec parts without removing the workpiece from the machine tool. Because CNC programmers can design measurement routines directly in the program, it enables the manufacturer to finish more of the part in a single setup, often avoiding errors, rework and unnecessary downtime.
Advantages of On-Machine Probing
Setup: In-process metrology can verify the placement and dimensions of the workpiece, ensuring that the tool path is not thrown off by minor differences in placement during setup. Touch probes are excellent at confirming the exact location and size of the workpiece or fixture, and they accomplish it much faster than manual measurements can, with fewer errors. When designing an automated process to finish multiple parts in a single setup, touch probes move from a time-saving luxury to necessity. Verifying the correct positioning of parts loaded by pallets, robots or other automated systems is crucial to accurate machining, and on-machine verification using touch probes is often the fastest way for automating this process.
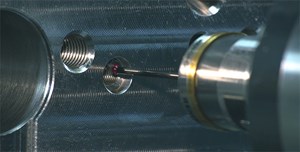
In-process verification enables the manufacturer to ensure tolerances have been met. LEARN MORE.
Process Control: By measuring the workpiece as part of the manufacturing process, the user can monitor machined features to identify errors. For example, tool deflection when working with a hard-to-machine material can lead to a lower material removal rate than expected. Often enough, this leads to reworks that eat up time. However, a touch probe can identify when the part is outside tolerance during the process, enabling the machine tool to alert the user or even to automatically adjust the cutter to compensate. Again, the ability to verify not just the size and position of a workpiece, but also the success of a given pass makes in-process metrology an excellent tool for automation.
Tool Setting: Having the correct positioning of the tooling is as important as having the correct positioning of the workpiece. Minute flaws in a tool or toolholder can completely throw off a pass, harming tool, workpiece and machine alike. Just as they can identify minute errors during workpiece setup, in-process touch probes can accurately detect inconsistencies in tools or tool setting, avoiding costly errors.
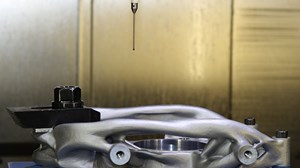
In-process inspection is a time saver for complex 3D-printed and five-axis parts. This probe can access the part from many angles to gain accurate measurements.
Complex Part Inspection: Technologies such as five-axis machining and additive manufacturing have enabled manufacturers to produce parts with increasingly complex geometries. In order to economically produce these parts, in-process verification is necessary. In particular, multi-axis probing excels at verifying deep holes and complex shapes in any machining orientation. As with simpler shapes, making these measurements on the machine enables the user to quickly adjust the process to compensate for any errors.
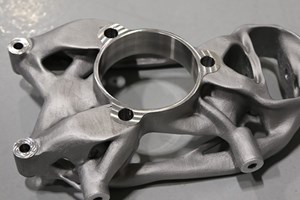
Hybrid parts like the one pictured above rely on in-process inspection. This is to establish that enough stock has been printed, to optimize the positioning of finishing passes and to verify the final geometries after machining.
Hybrid Manufacturing: With additive manufacturing (AM) growing more prevalent, some machine shops are beginning to invest in hybrid machine centers capable of both additive and subtractive manufacturing. This enables them to benefit from both the design freedom of AM machines and the precision and accuracy of a machine tool. While many machines benefit from in-process verification, this is a must for hybrid machines. Because hybrids print the forms that must be machined, they must complete multiple operation steps in sequence- and it is essential to manage the tolerance stack up across the different operations. The manufacturer must first verify that enough stock has been produced before any machining process begins. The next step is to optimize the location of the stock for each machining pass, and the final step is to verify that enough material has been removed before moving to the next step.
Software Needs for In-Process Inspection
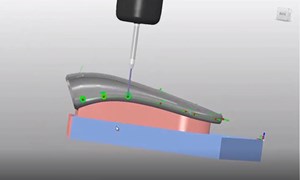
This workpiece is undergoing simulated inspection in PowerInspect by Autodesk. Locating a part using on-machine touch probes enables further automation.
To take full advantage of the opportunities that in-process probing provides, shops need to be able to process and adapt to the information that the touch probe provides. PowerInspect from Autodesk, for example, can automatically process information from inspection and make necessary adjustments to the toolpath. The software can generate and simulate inspection paths, then transfer those paths to the machine tool. PowerInspect’s features enable users to align workpieces, measure complex geometric features, calculate alignments and verify the tolerance of complex shapes, all without having to transfer the workpiece from the machine. The time savings can be significant, but it also enables automated and lights-out machining by enabling the software to verify tolerances without human intervention. Further, it is capable of five-axis inspection to probe complex geometries and deep holes.
Additionally, PowerInspect benefits from its integration with PowerMill, Autodesk’s CAM platform, enabling manufacturers to make use of the advanced inspection capabilities of PowerInspect, seamlessly transferring G code and M code without jumping through hoops. This by itself can be an important time saver, essentially cutting minutes out of every machining operation on any machine running both PowerInspect and PowerMill.
With the advantages that in-process inspection provides, more and more shops will seek to incorporate it into their process. However, in order to fully realize the benefits of this technology, investing in the right software is key. Using tools like PowerInspect, manufacturers can more easily upgrade their technology, cutting time and moving towards more reliable automation.
Read more about PowerInspect.