
10 Steps to a More Organized Work Area
Workplace organization can be overwhelming. Break it into smaller steps to make it more manageable.

Share


.png;maxWidth=45;format=webp)
DMG MORI - Cincinnati
Featured Content
View More
Autodesk, Inc.
Featured Content
View More

Takumi USA
Featured Content
View More


Hwacheon Machinery America, Inc.
Featured Content
View More


ECi Software Solutions, Inc.
Featured Content
View More


Most of us would agree that a well-organized work area makes everything safer, more efficient and easier for those working in it. Yet initiating workplace organization can be an overwhelming task despite the many books and articles written about it. For those reluctant to start, the task can be made more manageable if it is broken down into smaller pieces. Here are 10 steps to a more organized work area.
1. Observe workers in their work areas.
Look for some of the wastes of time and effort I have discussed in prior columns. Are employees mostly staying at their workstations, or are they spending time looking for things they need, bringing them to their workstations and moving items around to make room? None of these actions add value. They also represent three of the eight types of waste: 1) excess motion (looking for things), 2) excess transportation (bringing things to the workstation) and 3) excess inventory (moving unneeded items around).


2. Determine if workstations are properly sized.
If they are too large, clutter can form. If they are too small, there will be insufficient room to accommodate the items needed to perform required tasks.
3. Determine if storage devices are properly sized.
Storage devices include toolboxes, cabinets, drawers, bins, shelves, carts and more. As with workstations, storage devices that are too large will lead to the collection of unneeded items, while those that are too small may prohibit keeping necessary items where they are needed.
4. Identify items needed for the job at hand.
Are all the items in the work area being used for the jobs currently underway? If they are not, they are candidates for removal. That said, that doesn’t mean they ultimately will be removed. Employees should give input as to how often these items are used in the work area. One way to get an accurate answer is by asking when an item was last used. If it was not used within the past few days, it probably should be relocated. This will create room for other items that are used more frequently to stay in the work area.
5. Remove the unneeded items.
If items in the work area are defective, they should either be repaired or scrapped. If they are obsolete, they should either be sold or scrapped. If they are usable, they should be relocated to another area where they are used more frequently or placed in a storage device in the work area. If the item will not be used, it should be sold or scrapped regardless of its condition, because excess inventory is a waste. (I know, this is a tough sell for many.)
6. Organize the work area.
Identify the best places to locate the items that are needed in the work area. These places should be as visible as possible. Hanging something in plain sight is better than hiding it in a drawer or cabinet. Open shelves and bins are alternative means of providing visibility to things that are needed on a regular basis. If limited space or resource constraints mean drawers and cabinets must be used, they should be well-labeled.
7. Observe the results.
If there is less wasted time and effort after relocating needed items to their new places, these moves should become permanent (at least until process changes necessitate further organization changes). If there is no significant improvement, alternative places and techniques must be considered. There is no point making change if it does not lead to something better.
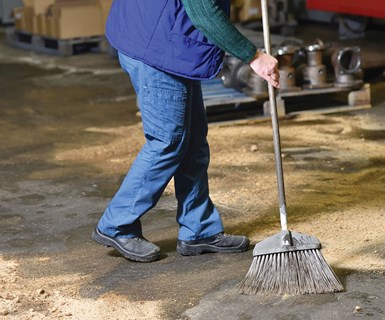
Expectations like cleaning the work area before the end of a shift ensure that organizational improvements stick. Read more about the end of shift cleanup.
8. Create organization expectations.
These standards help ensure that the organizational improvements stick. They can be as simple as: return all tools and equipment to their proper location after use, clean the work area before the end of the shift to ensure all items are in their proper location, and make sure only one job is on a workbench at any time. These expectations are an essential part of maintaining an organized work area.
9. Audit the work area on a regular basis.
Just as organizing a work area takes time, it takes time for an area be become disorganized. The shorter the time between audits, the greater the chance the work area will remain organized.
10. Recognize the areas that maintain good organization.
Small rewards are a nice touch, but if rewards are not possible, simple recognition and expressions of appreciation for any work area that stays organized make employees feel good. It also goes a long way in achieving a safe and efficient work area that makes everyone’s job easier.


Related Content

4 Steps to a Cobot Culture: How Thyssenkrupp Bilstein Has Answered Staffing Shortages With Economical Automation
Safe, economical automation using collaborative robots can transform a manufacturing facility and overcome staffing shortfalls, but it takes additional investment and a systemized approach to automation in order to realize this change.
Read More
4 Rules for Running a Successful Machine Shop
Take time to optimize your shop’s structure to effectively meet demand while causing the least amount of stress in the shop.
Read More
How to Choose the Correct Measuring Tool for Any Application
There are many options to choose from when deciding on a dimensional measurement tool. Consider these application-based factors when selecting a measurement solution.
Read More
Tips for Designing CNC Programs That Help Operators
The way a G-code program is formatted directly affects the productivity of the CNC people who use them. Design CNC programs that make CNC setup people and operators’ jobs easier.
Read MoreRead Next

Making Manufacturing Improvements Stick
The critical factor in making shop-wide improvements is manager participation.
Read More