Measuring The Benefits Of Mechanical Accuracy
Recently, with widespread use of error mapping to compensate for mechanical variations, the focus has shifted away from the physical parameters of gages and CMMs.
Traditionally, manufacturers have relied on the physical attributes of gages and coordinate measuring machines (CMMs) to maintain acceptable levels of quality. For CMMs, the criteria considered most important for accuracy are the stiffness and stability of component materials and structures. More recently, however, with widespread use of error mapping to compensate for mechanical variations, the focus has shifted away from these physical parameters.
Since the early 1980s, the development of CMMs that incorporate “virtual accuracy” has had some significant ramifications for users. Originally, error mapping involved software used to aid linear accuracy calibration of machine axes. Using this method, a CMM’s software scales are adjusted by using scale tensioners. Because this allows scale accuracy to be equated with a laser interferometer readout, it improves the CMM’s accuracy without compromising its mechanical qualities.
Soon after it was introduced, however, CMM manufacturers began using error mapping to compensate for more extensive mechanical inaccuracies. This allows builders to reduce costs by designing machines with considerably less precision than mechanically accurate machines. Error mapping also requires more frequent intervention by the OEM to maintain the accuracy of “locked” CMM maps that are inaccessible to third parties. This can create higher levels of uncertainty and inconvenience for users.
“Updating map parameters requires more time for the calibration process because it frequently requires verification of other related parameters,” says Otto Geiseman, president of Wenzel America, Ltd. (Wixom, Michigan). Additionally, previous calibrations of a mapped CMM may not be as complete as the user assumes. “Since the mapping process is so laborious, it’s not uncommon to find residual map files that don’t correlate with the calibration date,” says Mr. Geiseman. In certain cases, therefore, updating a mapped CMM can consume as much as twice the amount of time necessary to calibrate a mechanically accurate CMM.
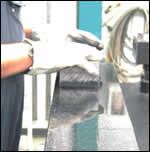
Wenzel applies a contemporary approach to the traditional quality paradigm. The company has introduced a line of CMMs that emphasizes high-precision mechanical components as an alternative to error mapping systems. In place of computer algorithms, these CMMs incorporate structures composed of stable materials that are well suited for metrological applications. To achieve high accuracy, for example, the CMM guideways are precision ground and hand-lapped by technicians using autocollimators to monitor their work. Combined with high-precision bearings, this technique produces an extremely accurate machine.
According to Mr. Geiseman, materials commonly used in the manufacture of components for mapped CMMs may be less than ideal. “Today, most CMM guideways comprise a combination of materials, with aluminum being the most prevalent,” he says. “While aluminum does provide some advantages in the manufacturing process, it’s a soft material that creeps and deforms easily. It’s probably not sufficiently stable for metrology purposes.” Besides being a less stable material in terms of weight, aluminum has a coefficient of expansion almost 4 times greater than granite.
Another important factor is that CMM mapping obscures the mechanical parameters of a particular measuring machine. “During mapping, the raw inaccuracy is measured but never revealed to the user,” says Mr. Geiseman. Because no governing body exists to sanction metrology standards for the design and accuracy of error maps, users face considerable uncertainty when maps are replaced.
These factors increase the appeal of a more conventional approach to measurement that is based on meticulous hardware design instead of software. Wenzel subscribes to the belief that a highly accurate machine is still the best means to ensure measurement quality. “Unlike mapped CMMs, mechanically accurate CMMs have nothing to hide,” says Mr. Geiseman. “Users have an intrinsic right to know if a CMM has zero compensation or 10, 20, 30 times more inaccuracy than the OEM’s stated values.”
Read Next
5 Rules of Thumb for Buying CNC Machine Tools
Use these tips to carefully plan your machine tool purchases and to avoid regretting your decision later.
Read MoreRegistration Now Open for the Precision Machining Technology Show (PMTS) 2025
The precision machining industry’s premier event returns to Cleveland, OH, April 1-3.
Read MoreRego-Fix’s Center for Machining Excellence Promotes Collaboration
The new space includes a showroom, office spaces and an auditorium that will enhance its work with its technical partners.
Read More


.jpg;maxWidth=300;quality=90)


