Release The Potential Of Your Machine Tool
Probing can improve OEE in many different ways throughout the machining cycle. (Sponsored Content)
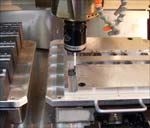
Probing has long been used for setup. With an inspection probe in its spindle, the machining center can touch a workpiece to quickly establish its location. Many manufacturers understand this, and many shops use the probe in this way. However, most of those shops fail to realize the many additional ways that on-machine probing can improve process efficiency. By using the probe strategically, a manufacturer can make 100% good parts—right the first time—in the lowest possible production time. The probe can even make it possible to do away with off-line inspection as a regular part of production. Given all that the probe can do, calling it an "automation tool" is not enough. A probe is actually many automation tools in one.
All That Probing Can Do
The most effective machining processes use probing for different purposes throughout the cycle. Manufacturers that use probing only at the start, to locate parts and set tools, miss out on much of what probing can accomplish. Adaptive process control and part verification are where probing can deliver the greatest gains.
Here is how probing improves efficiency and accuracy at many stages throughout the machining cycle:
- Setup. Used to locate the part automatically and establish a work coordinate system, probing cuts setup time, increases spindle availability, lowers fixture costs and eliminates availability, lowers fixture costs and eliminates non-productive machining passes. On complex parts, 45 minutes of fixture alignment can be replaced by 45 seconds of probing, which is performed automatically by the CNC.
- Fail-Safe Operation. Through probing macro cycles, a CNC can quickly check for changes to work coordinates, tool dimensions or part dimensions, and input the revised values automatically. This eliminates costly errors resulting from incorrect manual calculations or miskeyed information.
- Part Identification. Probing can determine that the correct part has been loaded before the CNC calls up the program. This procedure protects the machine against wrecks that might result from an accidental mismatch between the program and the loaded part.
- Tool Setting. A tool setting probe is an economical solution for on-machine verification of tool geometry and tool condition. The tool setting probe can automatically set length and diameter and identify broken tools, performing these functions while the tool is in motion.
- In-Process Control. Probing can be used to monitor the size and position of machined features during the cutting process. The information can be used to automatically apply cutter compensation or adjust the work coordinates. Correcting the program in-process in this way can eliminate scrap, reprogramming or rework.
- First-Off Inspection. Probing makes first-part inspection—to verify that the required dimensions have been achieved—both seamless and automatic. Using probing for first-off inspection eliminates the delays and lost spindle time that result from inspecting the part manually. The savings are particularly great when the operator would otherwise have to tear down the setup to perform the measurements.
- Final Inspection. Used to inspect parts after machining, probing reduces the need for inspection off-line. In some cases, probing inspection off-line. In some cases, probing can eliminate this inspection altogether. Using on-machine probing to "buy off" a part while the part is still fixtured can greatly shorten processing time, because it eliminates the need to transport the part to a CMM and perform a measurement cycle there. Inspecting on the machine is particularly beneficial for large and expensive workpieces that are difficult to move.
Can I Really Measure A Part On The Same Machine That Produced It?
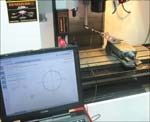
Absolutely. Most manufacturers will accept that probing can detect certain kinds of errors in the part, such as the errors resulting from tool wear or tool deflection. However, what so many manufacturers fail to recognize is that other sorts of errors can be detected as well. Machine tools today deliver accuracy and repeatability that can make them superb inspection devices. In addition, the performance of any particular machine can be established—and regularly checked—using easily accessible test and calibration technologies. One example is a telescoping ballbar, a machine-tool testing device that is affordable for almost any shop. When a precision machine tool is certified to be reliable and functioning well, that machine can be trusted to inspect its own work.
But what about thermal effects? Most machining doesn't take place in a temperature-controlled environment, and thermal variation that affects machining accuracy would seem to affect the accuracy of probing, also. Can the machine tool be trusted to measure a hot part?
Yes! Even thermal effects can be overcome. By probing a calibrated "artifact"—an object that mimics the features, properties and dimensions of the part—the measurement can be adjusted for the prevailing thermal conditions at that moment. This artifact is part of the setup, and its dimensions are established in advance. If a measured dimension of the artifact is off by X because of thermal effects, and if the part and artifact are similar in size and composition, then a similar feature of the workpiece can be assumed to be off by X as well. The correction can automatically be factored into the measurement.
This method works. It produces a reliable means of automating inspection. Renishaw routinely uses this technique in its own machine shop. In fact, Renishaw routinely uses this technique to manufacture the components of probes—including the very probes that other manufacturers will use to put this method of automation to work.
Related Content
Improving Workflows in Small Shops with Custom ERP
Small shops might not be ready for all of the functionality of an off-the-shelf ERP system, but modular, custom ERP programs can help improve workflow while providing the flexibility to change as shops grow.
Read MoreCAD/CAM System Requirements: An Overview
CAD/CAM programs are among the most demanding kinds of computer software. Smooth operation requires careful consideration of computer specifications.
Read MoreTips for Designing CNC Programs That Help Operators
The way a G-code program is formatted directly affects the productivity of the CNC people who use them. Design CNC programs that make CNC setup people and operators’ jobs easier.
Read MoreUnderstanding G27, G28, G29 and G30
Take a closer look at these reference position commands.
Read MoreRead Next
The Cut Scene: The Finer Details of Large-Format Machining
Small details and features can have an outsized impact on large parts, such as Barbco’s collapsible utility drill head.
Read MoreObscure CNC Features That Can Help (or Hurt) You
You cannot begin to take advantage of an available feature if you do not know it exists. Conversely, you will not know how to avoid CNC features that may be detrimental to your process.
Read More


