In Hogout Machining, the CAD File Becomes Critical
To serve customers by helping them bypass casting, this shop first needs a close-enough relationship with the customer that it can count on getting good CAD data. Here is why.
The January issue of Modern Machine Shop describes R&D Manco’s ongoing shift from machining castings to greater machining of hogouts. One significant detail the article did not have the chance to address is the growing significance this shift brings to having complete and precise CAD data from the customer. In short, before R&D Manco could help its customers by streamlining its manufacturing, it first had to have conversations with customers about obtaining these reliable digital models.
Five-axis machining is part of the reason. Machining castings need not be as complex as machining from solid. The machining of castings is liable to include milling mating surfaces and drilling and tapping holes. This machining might be multi-face or multi-setup, but not five-axis. By contrast, programming the five-axis contour-machining cycle for a part with the organic, complex form of a casting obviously requires an accurate part model from the customer. In hogout machining, the digital model rather than the physical casting is the shop’s starting point.
The digital model is also the end point because it is this model that defines what the customer expects and what the shop will deliver. Indeed, having a good CAD model offers the chance to not only streamline machining (applying tactics such as trochoidal machining, for example, where the stock allowance around the parts permits), but also streamline inspection. R&D Manco recently began experimenting with “Productivity+” software from Renishaw, software for comparing probing measurements of a machined part at the machine tool with the original CAD model for that part. So far, the shop has developed enough confidence in this software to trust it for first-article inspection, an advance that saves considerable time. The part no longer has to be removed from the machine tool while the machine and the machinist wait for first-article inspection as an independent step, but instead, this validation of the machining process now can be quickly performed entirely at—and by—the machine tool.
But another vital opportunity the CAD model provides in hogout machining is the chance to save the customer money by proposing geometric changes. A part that was formerly a casting frequently has features only a casting requires. Examples include radiused features that are natural to casting but would demand a significant amount of cycle time for contour milling if they had to be reproduced in machining. Frequently, a part converted from casting to hogout is so well established that no one involved has any memory that certain features were designed for casting’s sake alone. Part of the job of CAM programmers at R&D Manco, therefore, is to spot and question potentially unnecessary features such as this.
Indeed, with the advance into greater machining of hogouts, the role of the CAM programmer at this shop and demand on programming capacity have significantly expanded. In the past, this shop had two engineers proficient at CAM programming, and that was plenty. Today, two other engineers who have previously been involved with process planning are also being trained in CAM programming, so the number of programmers will soon be four.
Related Content
How To Calibrate Your Calipers
If you’re interested in calibrating your own digital, dial or Vernier calipers, here are some steps to take to make sure it goes off without a hitch.
Read MoreChoosing the Correct Gage Type for Groove Inspection
Grooves play a critical functional role for seal rings and retainer rings, so good gaging practices are a must.
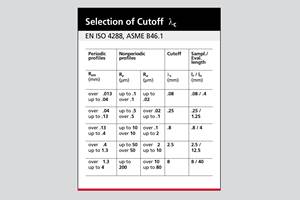
Read MoreHow to Choose the Right Cut Off When Measuring Roughness
Measurement results for surface finishing parameters can vary depending on the filter parameter (Lc), also known as the cutoff.
Read MoreDetermining Out-of-Roundness at the Point of Manufacture
George Schuetz, Mahr Inc.’s Director of Precision Gages, offers these techniques for measuring roundness on the shop floor.
Read MoreRead Next
The Cut Scene: The Finer Details of Large-Format Machining
Small details and features can have an outsized impact on large parts, such as Barbco’s collapsible utility drill head.
Read More3 Mistakes That Cause CNC Programs to Fail
Despite enhancements to manufacturing technology, there are still issues today that can cause programs to fail. These failures can cause lost time, scrapped parts, damaged machines and even injured operators.
Read MoreObscure CNC Features That Can Help (or Hurt) You
You cannot begin to take advantage of an available feature if you do not know it exists. Conversely, you will not know how to avoid CNC features that may be detrimental to your process.
Read More
.jpg;width=70;height=70;mode=crop)


