Tool Presetting Ensures Tool Quality While Saving Time
The Edon, Ohio, plant of Metaldyne (Plymouth, Michigan) produces one of the most complex parts on an automobile: the steering knuckle. Irregularly shaped with a variety of surfaces and holes to mill, drill and bore, steering knuckles provide a machining challenge that usually requires some finesse to meet.
The Edon, Ohio, plant of Metaldyne (Plymouth, Michigan) produces one of the most complex parts on an automobile: the steering knuckle. Irregularly shaped with a variety of surfaces and holes to mill, drill and bore, steering knuckles provide a machining challenge that usually requires some finesse to meet.
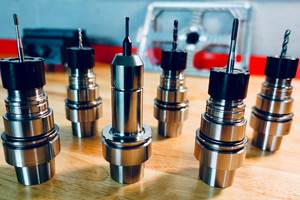
Automobiles have either two or four knuckles, which are typically made of steel, cast iron or aluminum, as part of the suspension. Production volume, as well as product quality, is an important consideration when machining these components. To achieve adequate production levels for several knuckles, the plant employs dual-spindle machining centers. Each spindle performs similar operations on left- and right-hand knuckles located in a fixture. Toolholders are shrink-fit HSK 100 and HSK 80.
"We felt that shrink-fit holders were essential," says Chris Filoso, Metaldyne manufacturing engineer. "When compared to collet chucks, hydraulic chucks or other types, shrink-fit holders offer the best possible concentricity and gripping power while eliminating the expense of parts such as collets."
"Because each spindle performs mirror image operations, our operators must match the tooling used in the twin-spindle machining centers to within 20 microns," he adds.
Previously, the company believed that a shrink-fit tool changing machine and a separate presetter would accomplish adequate tool changing and setting. However, this two-stage process proved to be time-consuming because one machine was needed for shrinking/unshrinking the tool, while a second device was required to measure and preset the tool. Other cons of this arrangement were that the tool setting accuracies mandated by plant standards could not be achieved, and the tool presetter could not automatically write tool data to the Balluff chip embedded in the company’s holders.
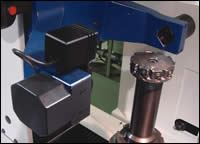
Anticipating that adequate accuracy and time savings would be realized, the plant acquired a redomatic heat-shrink tool presetter and measuring machine from Zoller Inc. (Ann Arbor, Michigan). Including features such as a Z-axis measuring range of 23.58 inches (600 mm) and a diameter of 15.72 inches (400 mm), the three-axis CNC vertical tool setter and measuring machine is now employed by the company to preset, heat shrink, cool and measure tools in one automated process.
Heat shrinking to a nominal length is only possible when one unit performs the entire process. The system has a 10 kW capacity for shrink fitting shank diameters ranging from 0.12 inches to 1.26 inches (3 mm to 32 mm), and in lengths as large as 600 mm, with heating times varying from 5 to 10 seconds. Cooling requires approximately 30 seconds or less with reliable water-cooled cooling adapters, according to plant engineers.
The machine used at Metaldyne incorporates a vision system that provides automated measuring and inspection of each tool in the plant’s arsenal. Two CNC-driven linear slides—vertical and horizontal—position the optic carrier, and the spindle rotation permits focusing on the tool.
"The image processing technology permits automated measurement of tool length, diameter, corner radius and two cutting edge angles," explains Mr. Filoso. "The software detects cutting edges almost instantly, and then the camera in the optic carrier transmits the image of the tool edge to the control and screen."
Mr. Filoso comments that, in addition to ease of use, the system offers various benefits. "The machine can set any shrink-fit tool to the required length within ±10 microns," he reports.
"To shrink clamp a tool to a nominal length, our operator need only input data, such as the nominal length, toolholder diameter and tool material (HSS or carbide), via an easy-to-comprehend human-machine interface," explains Mr. Filoso. "Each tool contains an ID number to enable users to retrieve and use this data later on."
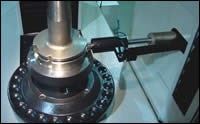
The induction-heating coil is positioned over the holder, where the coil then heats the holder. The tool is loaded into the holder, and the CNC-driven tool length stop is said to ensure correct tool positioning—for example, tool tip to gage line. The operator selects one of five cooling adapters and positions it over the holder. After this step, the tool is checked again automatically, and measurement results are transferred to the tool identification chip.
"The entire procedure is carried out in about 2 minutes," says Mr. Filoso, "which includes changing the tools and achieving the accuracies we need." Any correction values are stored and can be used in the next shrink-clamping process.
Mr. Filoso goes on to explain how non shrink-fit tools can also be measured, and the resulting time savings are even greater compared to those experienced with the previous method. For example, a ten-insert tool is usually inspected one insert at a time. This would also mean that the operator would have to conjecture the extent to which each would need to be adjusted. Contrasting this procedure, the redomatic automatically evaluates each insert and indicates the amount each insert should be adjusted. After receiving this information, the operator acts accordingly.
"We can provide accuracy to within 3 microns on each tool, which, in turn, results in improved machining quality," says Mr. Filoso.
Metaldyne reports another added benefit of using the system: the capability to monitor tooling life for each tool on each machining center. The chip on the toolholder identifies the tool and offsets and generates cycle times for each tool and insert.
Although full implementation of an automatic tool presetting system is a process, workers at the company were able to program inspection and measurement after 2 days of training.
Related Content
Walter Offers New Solid-Carbide Taps for Blind-Hole Machining
Walter’s TC388 Supreme and TC389 Supreme feature patent-pending cutting geometries that fully shear off the root of the chip when reversing, thus minimizing torque peaks.
Read MoreWalter Launches New Solid Carbide Drill
The DC118 Supreme solid carbide drill provides high rigidity against deflection, superior centering accuracy and four margins with corner chamfers.
Read MoreHow Lowering Torque Improves Tapping Tool Life
Escaping the tap breakage trap requires a long look at torque and the many factors that influence it.
Read MoreHow to Tackle Tough Angled Pocket Milling With Two Tools
Milling a deep pocket with a tight corner radius comes with unique challenges, but using both a flat bottom drill and a necked-down finishing tool can help.
Read MoreRead Next
Obscure CNC Features That Can Help (or Hurt) You
You cannot begin to take advantage of an available feature if you do not know it exists. Conversely, you will not know how to avoid CNC features that may be detrimental to your process.
Read MoreThe Cut Scene: The Finer Details of Large-Format Machining
Small details and features can have an outsized impact on large parts, such as Barbco’s collapsible utility drill head.
Read More3 Mistakes That Cause CNC Programs to Fail
Despite enhancements to manufacturing technology, there are still issues today that can cause programs to fail. These failures can cause lost time, scrapped parts, damaged machines and even injured operators.
Read More




.png;maxWidth=300;quality=90)


