Touch Probe Calibration: Does Your Standard Shape up?
These two shops’ experiences reveal the value of choosing artifacts that match the geometry of the measured feature as closely as possible.
Share


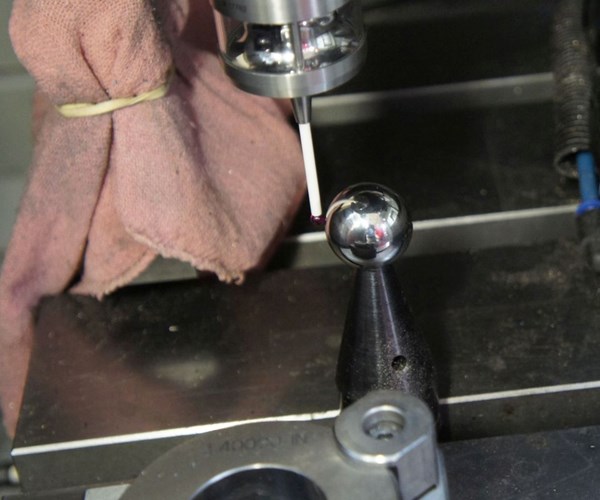
Spherical calibration standards, which are permanently mounted to machine tables at Dynamic Tool, are recommended for 3D measurement routines.
Although they do very different work for very different industries, Dynamic Tool & Design and Integral Machining LTD both emphasized a similar point about touch probe calibration during recent shop visits. That is, the more closely an artifact matches the geometry being measured, the greater the precision of the resulting inspection routine.
At Dynamic Tool, a 38-employee Milwaukee-area plastic injection mold manufacturer, this point came up as part of a broader discussion about a transition to conducting part measurements on machine tools (this June-issue feature article covers that journey). Although the company had long taken advantage of touch probing routines on its 13 workhorse hard milling and sinker EDM machines, the measurements were previously limited to indicating (that is, ‘zeroing-in’ workpieces). For these 2D routines, a ring-shaped standard of known dimension was more than sufficient to calibrate the probe. Since moving into 3D part measurements, however, the shop has installed spherical artifacts on its machine tables. Because the probe can contact the evenly round sphere from a far greater number of angles than the ring—angles that are more representative of how the probe will approach various features on the workpiece—the set of compensating offsets for tip diameter, deflection and so forth is more thorough.
The story at Integral Machining is similar. In this case, however, the 9-employee, Toronto-area precision machine shop opted for a ring over a sphere. The job in question came from one of the shop’s newer customers: microfluidics and photonics industry companies that often require meeting tolerances in single-digit microns, far more precise than anything the shop had seen prior to about 2010 (this July-issue feature article covers Integral’s journey into micron-tolerance machining).
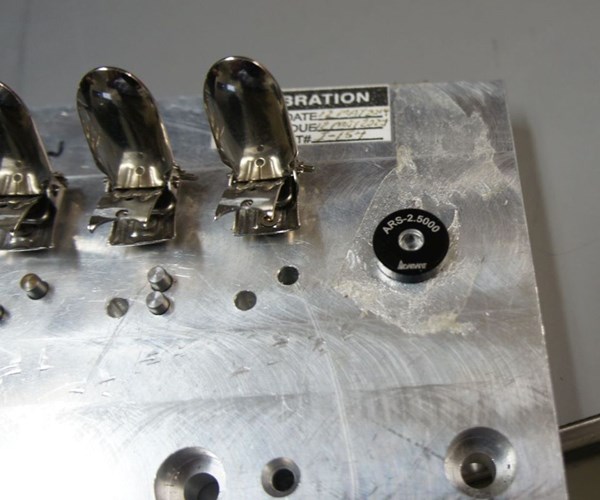
In this particular case, such tight tolerances had been called out for a series of critical bore diameters that were proving difficult to measure repeatably on the shop’s CMM. The shop’s eventual solution was to supplement the datum sphere the shop had historically used to calibrate touchprobes with a 2.5-mm-diameter, cubic zirconia ring gauge with dimensions guaranteed to 6 decimal places. Granted, the sphere retains the advantage for 3D measurements. For this portion of this job, however, calibrating against the ring gauge enabled the shop to make even finer adjustments to account for the diameter of the probe tip—adjustments that proved critical to ensuring more accurate and repeatable measurements of the 2.5-mm-diameter bores.

Integral Machining’s cubic zirconia ring gauge proved better than the shop’s datum sphere for precise, 2D bore diameter measurements.
Granted, I’ve attempted only to take a basic, “30,000-foot view” of this topic here. Boiled down to essentials, though, it seems to me that calibrating against the 2.5-mm-diameter ring gage was a better option for Integral Machining because this routine precisely mimicked the actual measurements that would be conducted on the 2.5-mm-diameter bores. Indeed, production manager Andrew Sweeting says he might consider using cylindrical artifact to ensure precision on a particularly critical outside diameter.
All in all, both shops’ experiences demonstrate that taking another look at probe calibration artifacts might be more than worth it for any shop encountering difficulties with precision or repeatability on a particularly critical measurement.
Related Content
The Link Between CNC Process Control and Powertrain Warranties
Ever since inventing the touch-trigger probe in 1972, Sir David McMurtry and his company Renishaw have been focused on achieving process control over its own manufacturing operations. That journey has had sweeping consequences for manufacturing at large.
Read MoreParts and Programs: Setup for Success
Tips for program and work setups that can simplify adjustments and troubleshooting.
Read More6 Machine Shop Essentials to Stay Competitive
If you want to streamline production and be competitive in the industry, you will need far more than a standard three-axis CNC mill or two-axis CNC lathe and a few measuring tools.
Read MoreHow to Evaluate Measurement Uncertainty
Manufacturing and measurement are closely coupled. An important consideration for the use of measurement results is the associated measurement uncertainty. This article describes common metrology terms and provides an example uncertainty analysis.
Read MoreRead Next
Building Out a Foundation for Student Machinists
Autodesk and Haas have teamed up to produce an introductory course for students that covers the basics of CAD, CAM and CNC while providing them with a portfolio part.
Read More5 Rules of Thumb for Buying CNC Machine Tools
Use these tips to carefully plan your machine tool purchases and to avoid regretting your decision later.
Read MoreRegistration Now Open for the Precision Machining Technology Show (PMTS) 2025
The precision machining industry’s premier event returns to Cleveland, OH, April 1-3.
Read More


.jpg;maxWidth=970;quality=90)