A Practical Guide To Presetters
Tool measurement devices help shops save time, control runout and improve tool management.
Share


Takumi USA
Featured Content
View More

Every machine shop has a tool measurement device, says Richard McCarthy. In some shops, the tool measurement device is the machining center itself. That can be an expensive way to go.
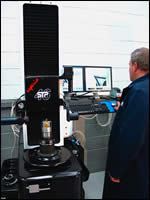
Mr. McCarthy is a national sales manager for tool measurement systems with Big Kaiser Precision Tooling (Elk Grove Village, Illinois). The tool measurement devices he helps shops to implement are commonly known as “presetters.” The term may be somewhat misleading, because shops using these devices enjoy a range of benefits even if they don’t literally “preset” their tools. Typically, the most significant of these benefits is saving time at the machining center. As an alternative to using feeler gages and test cuts to determine tool offsets at the machine, using a presetter to perform independent tool measurement away from the machine can free up considerable productive time.
Who Needs A Presetter
Mr. McCarthy says job shops often assume they aren’t good candidates for presetters because their production quantities are small. In fact, job shops often represent the very best applications for presetters. A process that might not need a presetter is one that runs the same part all day long, day after day. A process like this requires tools to be changed out only because of wear. By contrast, job shops change tooling not only because of wear, but also because of new jobs. The more frequently a shop has to load a fresh tool in a machining center, the more savings off-line tool measurement can deliver.
However, even facilities with long stretches of time between tool replacements might benefit from off-line measurement. An additional advantage relates to the impact of runout on tool life and productivity. By using a presetter to set up its tools, a shop can detect runout problems and hold each tool to a defined runout limit. Without this kind of control, machining with too much runout accelerates tool wear by forcing one edge to perform the brunt of the cutting. A shop that doesn’t recognize this problem may run slowly or take shallow cuts just to preserve the life of the tool. By identifying and curing the problem, the shop can realize more aggressive material removal.
Controlling runout is particularly important for small-diameter tools because the acceptable runout for any tool is proportional to its size. According to Mr. McCarthy, this is the reason why one high-volume manufacturer implemented presetting. While time lost at the machining center was not a concern, the shop believed tool runout might be a significant problem for its small-diameter tools. After discovering runout error resulting from the toolholders, the shop switched to holders that permitted faster production. Without using the presetter to perform this diagnosis, the shop may never have considered this fix.
Prerequisites
Shops implementing presetters often learn lessons like this because the presetter forces a more disciplined approach to measuring tools. In fact, it also tends to force a more disciplined approach to tool management. Tooling stored in toolboxes and bins throughout the shop needs to be gathered together in a central location close to the presetter. Getting all the tooling in one place may save the shop considerable time in its own right because operators no longer have to roam the shop in search of tools.
This centralization is just one of the requirements for successful off-line tool measurement, Mr. McCarthy says. Another requirement is an investment in having a sufficient number of tools and holders on-hand. If the shop is no longer doing tool measurement at the machining center, then it should have enough extra tooling to run production while the presetter measures the tools that will be needed next.
Which Presetter Is Right
Various presetters are available across a range of performance levels. Big Kaiser offers contact and noncontact models from Diaset and Speroni, respectively. The contact measurement involves an indicator, while the noncontact measurement is optical and might be performed either manually or through CNC.
The contact presetters are the least expensive. The noncontact models tend to be both more accurate and more efficient. Mr. McCarthy points out that optical models are upgradeable, so it’s usually not necessary to begin with an aggressive menu of capabilities. “About the only thing we can’t expand is the iron,” he says—meaning the presetter’s size should be carefully chosen to match the largest tool the shop is likely to need to measure in the future.
The other fundamental consideration is accuracy. If the shop accepts the rule that gages should have 10 times better accuracy than the part tolerance, then this rule can suggest the required accuracy of the presetter. For example, if parts are to be machined to accuracies as loose as ±0.005 inch, then tools can be inspected to ±0.0005-inch accuracy using a contact presetter, Mr. McCarthy says. At ±0.002-inch part tolerances or tighter, an optical system is necessary to achieve the corresponding accuracy of tool measurement.
Getting The Data To The Machine
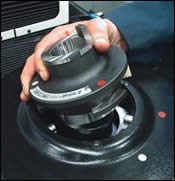
No matter how precise the measurement, there is still the challenge of getting the tool measurement data to the machine—a step that offers plenty of opportunity for error. Some presetters offer a label printer to avoid human error in writing numbers down. The correct measurements are printed out and affixed to the toolholder. Even then, there is the “fat finger” problem, which occurs when data from the label is miskeyed into the control, Mr. McCarthy says. To avoid this error, some presetters compose NC programs for assigning correct tool offsets. The machine tool’s CNC runs this program before running the machining cycle. The operator simply has to load the tools into the correct pockets.
To avoid the potential for error even in this tool loading, a still more aggressive approach is the use of tool ID tags capable of storing electronic data at each toolholder. With a system such as this, the presetter can write tool offsets to each tool-and-toolholder assembly. The CNC using a reader for these tags can identify the tool automatically, read its offsets, and cycle the tool magazine around to the right pocket for loading.
Qualified Tools
One final way some shops try to avoid errors in communicating tool data is by keeping the tool offsets always fixed. They use “qualified” tools. That is, they use tools that literally are “preset,” because the user employs the tool measurement system to help him adjust the tool’s length within the toolholder until it matches a certain predetermined value. (Only in a case such as this is the measurement device truly used as a “presetter.”)
A few types of machines demand these qualified tools because they have no freedom to apply offsets. These machines include transfer lines, twin-spindle machines that use identical tools in parallel processes, and five-axis machines with CNCs that lack the capability to adapt complex tool paths for tool offset changes. Boring tools also have to be preset to specific dimensions. Apart from these applications, most users of presetters employ the device to measure the tool as it is.
However, the potential to take this opposite approach—determining the offset first and setting the tool to match—illustrates the increased range of options the shop has available with a presetter. The need to transfer data to the CNC can be rendered unnecessary as the shop applies the presetter to standardize the tool dimensions and achieve even greater control over the management of its tools.
Related Content
Finding the Right Tools for a Turning Shop
Xcelicut is a startup shop that has grown thanks to the right machines, cutting tools, grants and other resources.
Read MoreAddressing the Manufacturing Labor Shortage Needs to Start Here
Student-run businesses focused on technical training for the trades are taking root across the U.S. Can we — should we — leverage their regional successes into a nationwide platform?
Read MoreCan Connecting ERP to Machine Tool Monitoring Address the Workforce Challenge?
It can if RFID tags are added. Here is how this startup sees a local Internet of Things aiding CNC machine shops.
Read MoreThe Power of Practical Demonstrations and Projects
Practical work has served Bridgerland Technical College both in preparing its current students for manufacturing jobs and in appealing to new generations of potential machinists.
Read MoreRead Next
The Real Cost Of Runout
A seemingly small amount of runout can still be too large for the tool. Reduce this runout, and tool life or productivity may dramatically increase.
Read MoreExtreme Tool Setting
A plant performing 79,000 tool setups per year measures these tools with one presetter and two gatekeepers.
Read More




.png;maxWidth=300;quality=90)


.jpg;maxWidth=300;quality=90)


